Showing posts with label Tad Porter. Show all posts

Friday, September 7, 2012

CLIFFS JOB, BETTER VIEW...

 Another wonderful day at Goodwin Mill And Cabinet.  As much as I love these new pics I have of the Cliffs job, I still hope to get in one more time before the job closes.  This blog entry will show you almost everything we did in the home with the exception of the doors (as they are not all hung yet), and some hardware.  We don't always get the chance to show cabinetry in a home after it's decorated; but it would be wonderful if we could showcase all of our jobs.

 The first few pics are of the Casita again.  Here is the main kitchen area.  You've got the small sink on the base vanity, space for a small fridge and some granite for the counter.  The upper has a space for a microwave.  


Originally, these shelves were open, but they owners added the lower cabinets on them.  I think the previous photos showed the shelving without these base cabinets.  The shelves are built right into the wall and they are finished on both sides with the one exposed front.  This set, if you're looking straight ahead, is on the right hand side directly behind the entry door.  The next photo shows the left hand side.  This one sits beside a rather large window and gets lots of natural light.  Because of this, getting a descent shot is kind of hard.  But   I think I got one here.  The window is partly showing and that gives you an idea how big it is on that wall.  It's a nice design.


 This photo is the vanity in the Casita bathroom.  I really love the finished shelf section with the rounded top.  It's not a big unit, but the finished shelving flows into the main room and gives the vanity a unique look.

 This is the specialty door we made specifically for this home.  I've got a contest running to name it right now.  So far, I've got about 6 entries.  6 suggestions for name.  We need to get more in order for this to work.  Please feel free to text me if you have a name suggest.  Remember, you can win a Subway gift card.
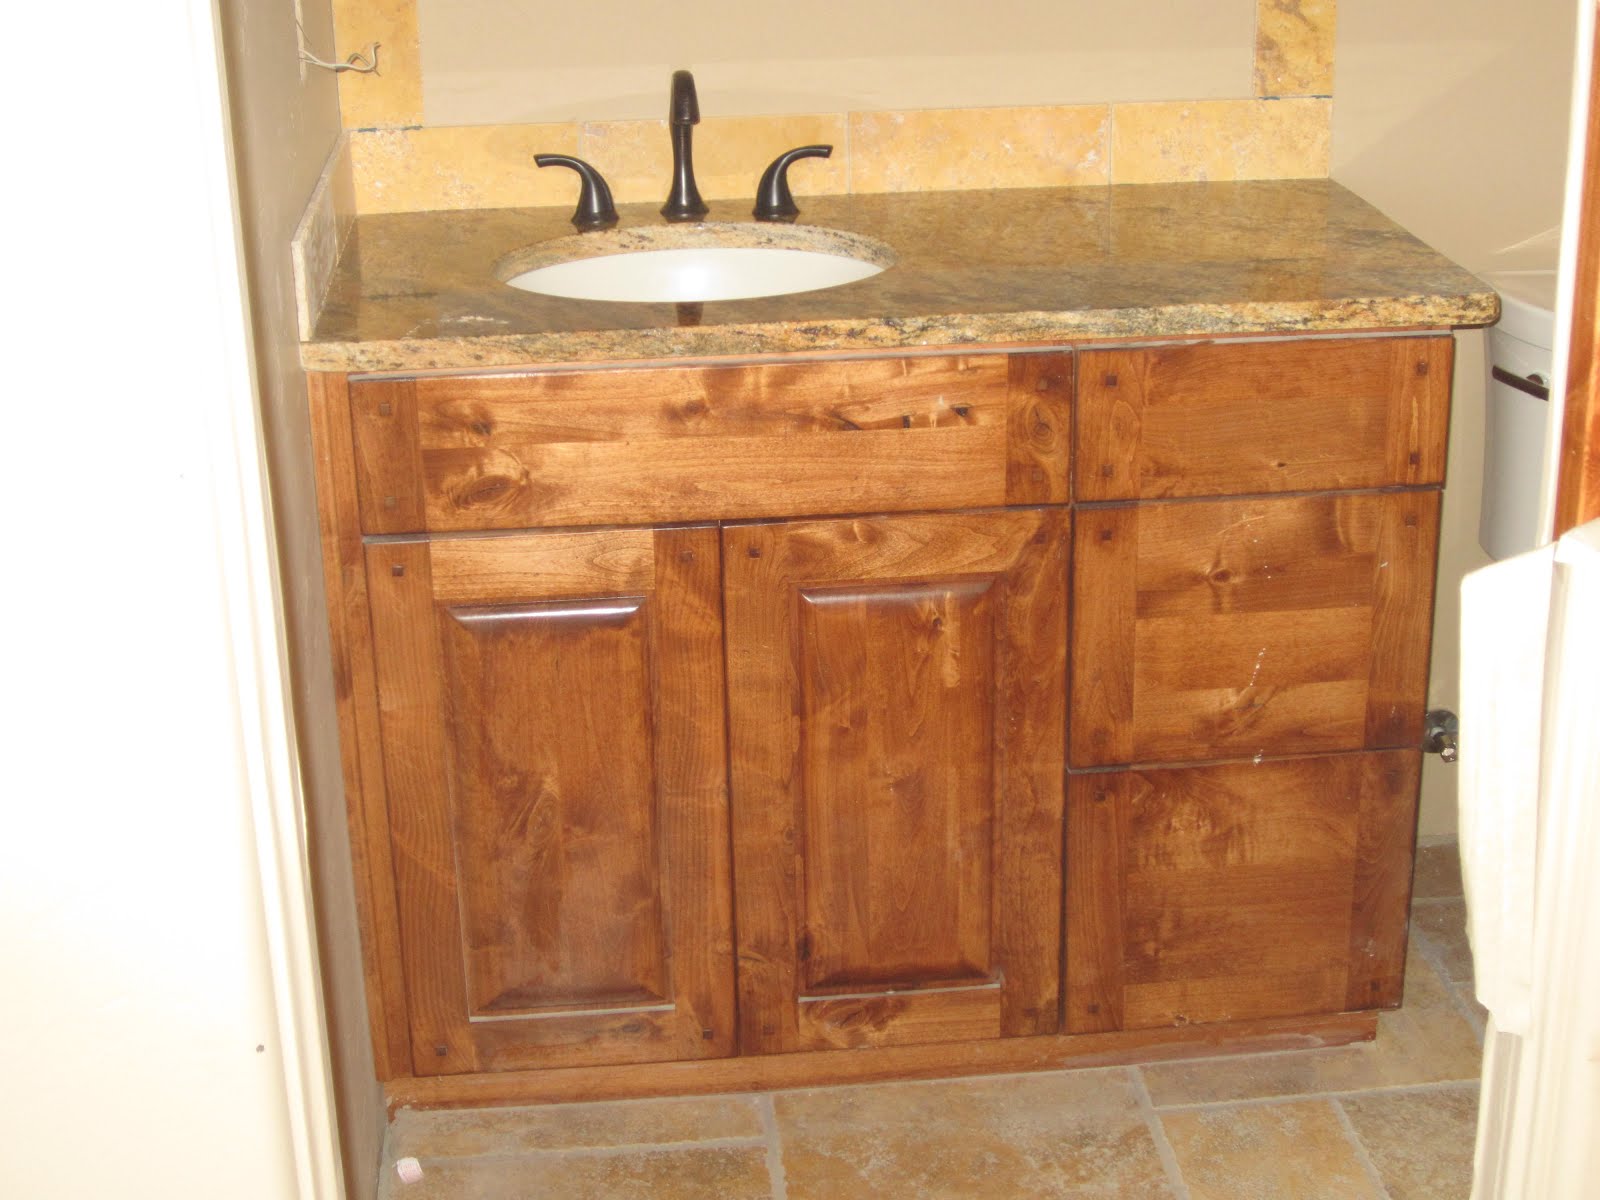
 This is the vanity in the guest bathroom in the main house.  Like the Casita bathroom, it has a section of open finished shelves.  The sink is an under-mount and already installed to the granite counter.  They still need to install the faucets.
 This is a head-on view of the vanity.  I think this view with the lighting really shows off the color of the stain.  It looks incredible.  Especially with the softer colors in the tile, counters and wall paint.  The cabinets really pop!
 This job has another couple of features I want to point out and this one is in the master bedroom.  We have two cabinets built into the wall.  Both are smaller units.  I think they are storage space for movies or DVD/Blu-ray player.  They're both simple shelf units.  I've got a photo of the other one.  I'll show it when we get to the Great Room.
 Now here's the master bath.  I took this shot from the tub, (which had not yet been installed).  I climbed in the opening so I could get a wide angle.  I also grabbed pics of the cabinets in sections.  
 This is the first section and as you can see, it has the sink vanity and then a drawer bank.  There is a smaller cabinet attached to the desk.  I'm not sure how the mirrors and lights are laid out, but I'm sure it's going to look amazing.
 Here's the second section. Like the first section, there's the sink vanity and a drawer bank.  The tile on the floor here is much darker.  I think it makes the cabinet color look richer.
 This unique piece is the vanity in the powder room. See the small hole in the middle of the granite counter?  This will be a sink that sits on top of the counter.  They are very cool.  The Brown house in Sky Ranch had one.
 This is the second wall unit.  It's located right next to the fireplace in the great room.  We also did the mantle above the fireplace. I'm not sure what the material is on the door, but it looks cool.
 And here's the Kitchen.  This is an outside shot of the barback.  This is a more complete view of this section of the lower bank.  There will probably be stools or chairs running along here.
 This is the full West wall of the Kitchen.  From left to right you have the glass door uppers, the stove top and range hood, counter space and a place for a microwave and finally a cabinet that will hold the oven.
 The island is a bold space of color in the Kitchen.  It's colored Green Grasses and  also has an under-mount sink.  The shape is another thing to mention because the island was designed to match a pattern in the ceiling.
 This is the East wall of the Kitchen.  From left to right, you have a pantry cabinet.  It's a full length shelf unit.  Then you have the space for the fridge with a small upper.  And finally, a row of glass door uppers and a row of base shelf units. 
 As you come around the corner on the East wall, you have this section.  There's some shelf units up and down with a space for a dishwasher.  That full length pantry cabinet is attached to the one right around the corner.
 Now we're in the laundry room.  This space was large enough to have cabinets on both sides.  This is the West wall.  From left to right, small upper, then two double door shelf uppers.  There's a desk/folding shelf.
 The desk section runs almost the entire length of the wall.  Both the uppers and the desk end with a full length piece.  It's a broom closet.  There are shelves in the upper section, but the lower area is reserved for brooms, mops and vacuums.
 This is the East wall.  From left to right you have a uppers working all the way across.  They are all shelf units.  The base cabinet in the corner is a small vanity and then you have the space for the washer and dryer.
 As you can see, there's another small base vanity.  Directly above it is a small upper with a closet rod mounted.  This is for hanging clothes once they come out of the dryer.
 This pic shows the middle section of the uppers.  These are the cabinets that will sit above the washer and dryer.  I wanted to draw your attention to the crown molding.  We're building the molding prior to installation.  The entire crown for this side of the room is a single piece we now shoot directly in place on the job.  It looks phenomenal and it's helped us save time during installation.  
The final pic shows one of the doors.  I took this one because we didn't have very many doors installed and I wanted to show at least one of the regular doors.  The other one I have posted is the front door and it's a specialty door.

So there you have it.  Newer, more exciting pics of our time at the Cliffs.  As always you can learn more information about our company by going to Goodwin Mill And Cabinet website.  You can also pop into facebook and check us out there.  Facebook is where you can enter to win the Subway gift card.  Just look at the pattern and suggest a name.

Friday, July 20, 2012

PORTER JOB AT THE CLIFFS

So yesterday I posted a teaser blog about Goodwin Mill And Cabinet doing a job in the Cliffs subdivision for GC Tad Porter.  Today I'm actually going to show you some of the work.  I want to do this in two blog entries though.  This one will show the work in progress and a later one will show the work when it's completed.  Also, I only have pics of the cabinet work that was installed while I was there.  The bathrooms were being worked on after the cabinetry was installed so I couldn't get in to get pics, but you will get to see it.  
 This first photo shows the vanity and flanking cabinets in the Casita.  The open cabinet actually has finished shelves in it and looks fantastic!  The drawer bank is always necessary for bathroom cabinetry.  As I mentioned the other day, the cabinets in the main house are almost all Antique Mahogany color.  The Casita uses the same.
 Now we're onto the kitchen!  This first pic shows an interesting cabinet.  It's actually two tall cabinets built together.  The wall behind them had such an interesting angle and the cabinets were going to have a gradual widening anyway, so we put them together.  This is one of the most interesting cabinets we've done.
As you can see, it sits beside the opening for the fridge.  There's the upper above the fridge and then a bank of uppers with glass doors.  I always love these showcase doors.  I think they're lovely and a great addition to any cabinet set.  The glass isn't set yet but you can see the inside is finished to match the face frame and there are finished shelves as well.
 The next pics show the hood.  These uppers are across from the ones I just showed you.  The hood goes all the way to the ceiling.  And there's another showcase cabinet with glass doors!  Wow!  Can you picture it?  The middle cabinet in the hood is actually just an enclosure for vent work.  It's not finished inside and will probably never be.  But then the only people who will actually open it are HVAC guys.  Still, I like the idea of it and it's smart to have such a functional cabinet and make it pretty.
 Next we show the cabinets to the right of the hood.  There are three you can see in this pic.  From left to right the first is the recessed thin cabinet.  The second has a space for the microwave while the third is a full length floor unit with a space for the oven.  I really like the way this section was designed because you have a gradual three step from the recessed cabinet to the floor unit.  When you look at them with the hood, it looks even more interesting.  There's some great geometric flow happening here.
 This pic shows the showcase cabinet, the hood and you get a better side view of the step pattern from the previous pic.  As you can see, only the right side and the hood have the crown molding on.  The right side took place later.
 This photo is an attempt to show the other wall with the angle cabinet and the two showcase uppers.  There's Greg, one of our crew and part of the installation team.  You can also see the wall frame we built along the back of the base cabinets.  A beautiful barback was attached shortly after I took this pic and I will show you that in a minute.
 These are the base cabinets.  The area on the ground where you see pipes sticking up is where the island will go.  As you can see, the base units run along the wall and then curve out and around along the wall we built to attach the barback.  At this point, the barback was on, but we're looking at it from inside the kitchen.
 These next two pics are of the barback.  I wanted to show it from the great room.  This is how the kitchen will look as you approach from anywhere else in the house.  That nice dramatic flow of the upper units and that gorgeous barback...  I can't wait to see it with counter tops on.
This is closer view of the barback.  I was trying to get rid of the glare from the big picture window nearby.  This house sits north to south in the lot, so it doesn't get a lot of direct sunlight, but it does get amazing natural light.  Lots of it.
 This is the laundry room.  With doors on both ends of the room, there's only the two walls to put cabinets on.  This side has a full length cabinet with a row of uppers and then a desk with two drawers.  The Antique Mahogany looks amazing in this room and really pops out with the wall color.  I think this room displays the color best.
 Here's the other side.  There's a vanity for a sink and then space for the washer/dryer.  There's a row of uppers and I believe there will be a closet rod hung under the smaller upper.  It will go from the finished side of that larger three door upper to the wall.
 The last two pics I have are of the vanity in the guest bath.  I saved these pics for last because of all the cabinets in this home, this one is really pretty and exceptional.  I love the door design and I really love the way the bottom of the cabinet was cut.
 I think this cabinet is quite fancy and a great example of some of the custom work you can find at Goodwin Mill And Cabinet.  If you can dream it up, we can build it.  I also love the turn posts on both sides.  It gives the unit a sturdy look and quite frankly increases the ornamental quality.  

There are more pics coming.  I'll get more once everything is installed and you can see how it all fit together.  This is the fourth or fifth house we've installed using our new system and as in the past, it's been effective and saved time.  Goodwin Mill And Cabinet is dedicated to producing exceptional cabinetry and timely installations.  Call today to set up an appointment with one of our Design specialists today and be on your way to having your dream kitchen!  We'll build 'em to fit your space!

Thursday, July 19, 2012

NEW CLIFFS JOB

 At Goodwin Mill And Cabinet nothing is standing still.  In fact, things are moving forward at an alarming pace.  The next job I'm going to profile here is the Porter home up in the Cliffs subdivision.
 The builder is a gentleman named Tad Porter of Porter Custom Homes.  We've done work for him before and enjoy his professionalism!  He's a great contractor.  I'll try to find a link to his website and include it.
 Before I start showcasing our work in this home, I wanted to give you an idea what the house and area were like.  The first two pics show the incredible custom wood beam ceilings.  We did not do the ceiling beams in this home.  I'm not sure who to give the credit to, but I think they are interesting and I wanted to show them because I think it helps you get a feeling for the taste and style of the owners of this home.  Personally, I think they are just marvelous!  It's made me think about different things we could do with our custom ceilings.  If I can find out who did the beams, I will include a link if they have a site.  Check back for an update.
 The next few pics attempt to show you what this house enjoys for a view.  You get great views of the incredible red rock mountains surrounding the area.  The lots themselves sit at the base of a range of these red cliffs.  Hence the name, "The Cliffs".
You can see another house being built across the street.  This lets you know how popular the area is.  Everyone wants to live there.  The third pic is taken directly from the garage where one might be standing if you were walking out to the driveway.  Isn't that incredible?

 This next pic is a sneak preview of sorts.  This odd looking ceiling actually mirrors an island we're putting below it.  It's also a peek at the cabinets already up in the kitchen.  The color for this house is Antique Mahogany.  The island will actually be Green Grasses, but the majority of the cabinetry is the Antique Mahogany.
The final pic in this entry is of the exterior entryway.  As you can see, the custom ceiling treatment is done out here as well.  It adds a touch of rustic charm to the home and even though this type of addition is often highly associated with a southwestern look, the home manages to keep clean, modern lines and achieves a strong sense of space and balance.  I absolutely love it!
I hope you're looking forward to seeing some of the incredible cabinetry Goodwin Mill And Cabinet has created for this home.  I'm excited to show them to you.  But we must have patience and you must wait another day until I can post a detailed entry on this house.  Until then, call Goodwin Mill And Cabinet today to set up your appointment to create your dream kitchen!

Wednesday, April 11, 2012

THE SKY RANCH HOME

The Sky Ranch home is being built by a young man named Tad Porter. We've worked with him before and he's a fine builder with quality homes. This job has been very exciting and interesting. The family choose a color with some red tones. These tones make the wood shine and give it an exotic feel.

The first pic is the master bath where you can see the main sink and the two uppers that sit on top of the granite
counter top. In the last entry, I showed you these stacked uppers in a more close up photo. Here you get a better view of how it looks together.

The second pic is the lower bank directly across from the main set. This bathroom has two sinks. As you can see in this pic, this set features a drawer bank, a sink vanity and another drawer/shelf combo cabinet on the end. In this photo you can also see the
base along the bottom of the wall and we supplied the base for this job.

Another feature this home has is an in-house Casita. This small apartment is connected to the main home through the hallway leading to the garage. In the first pic, you can see the base cabinets. The open portion with the door sitting on an angle is where the fridge will go and the door will attach to the front of it. The counter tops are
granite like in the main kitchen, but the slab is cut more thin.

The second photo shows the uppers. There's an opening here too, but this one is for a microwave. The crown molding on these cabinets is a two step molding, but also very simple. In combination with the finish, it makes these cabinets look very Southwestern. I love the way they look and I'm extremely pleased with how
they turned out.

This third pic is also part of the Casita. It's the bathroom. This little vanity may not be as flashy as some of the other pieces in the home, but it certainly matches and maintains the styles already introduced. I'm liking the idea of framing the mirror with tile. Once again you see the much thinner granite counter top.

This pic is the powder room. It's right off the Kitchen and behind the bar. It has some exciting features such as the thicker granite counter top and there are turned posts on both sides. This particular pic turned out dark in practically every shot I took. The combination of not enough light and the angle needed to get the shot prevented me from taking a decent picture. Still, I think this photo makes the point. You can still see the vanity and you get a good idea what's going on.

The next set of pics is the laundry room. As you can see in this first pic, the uppers run the length of the room and then stop where a window is. They pick up on the other side and use a smaller upper to go from the window to the wall. I never got a good pic of that second upper. The few times I tried to get photos the light blinded me and the cabinets were all in shadow.

The second pic shows the lower bank under the window and that other upper I couldn't seem to get a pic of. You can see the corner cabinet is a Lazy Susan of rather immense proportions. It was a huge cabinet and it was hard to get into place and install. The granite here is more thin as well. Although the floor isn't 100% clean, you can see the stamped concrete and you can also see the toe kick underneath as well. The stain color is highly complementary to the floor color.

This next photo shows the space where the washer and dryer will go. The base of this section is comprised of two drawers. The appliances will sit on top of a shelf that wasn't installed at the time this photo was taken. The drain you can see sticking up was cut into the shelf. At this point, the space is ready for installation. Above this open space
is a row of smaller upper units.

The next picture I'm sharing is in the great room. There's a beautiful stone fireplace and we provided a crescent mantle for it. It looks absolutely gorgeous! If you remember the mantles from the Jones Parade home, you will know these things look flattering and just amazing when they're decorated. If I can get a pic of this when it's all done, I'm sure it will be
incredible.

This next set of 3 are the bar adjacent to the Great Room. This view is from behind. You see the paneled side, the counter top and the sink. It fits between two partitions and is actually split into two parts. You will see it in the pics to follow, but there's a hood or ceiling over head. The bar had to be built out a little because of the size of appliances going in on the other side, so it was
technically installed twice.

The 2nd photo shows the top part and a partial view of the base cabinets. The 3rd photo will show the base cabinets more clearly, but I really wanted to show you this ceiling item. It's actually a pretty cool addition to the bar and gives it the look and feel of a tavern. It's almost like what you'd see over a pool table in a pool hall. Now in the next photo, the emphasis is on the
lower cabinet banks.

Here you can see the lowers. It has a space for an icemaker and a small fridge. I'm quite comfortable suggesting there should be some wine racks or a place to put glasses. From what I understand, there will be some runners along the top where the glasses will slide in facing downward. I'm guessing there will be some sort of rack on the counter top to hold the
liquor.

This final round of pics is the Kitchen. This is the main event as far as our work in the house is concerned. In this first photo, you can see a wide angle shot of the entire Kitchen. You can see almost all of the uppers and most of the base units with the exception of those blocked by the island. To the far left, you see the space where the fridge will go. There are two panels topped with a
small upper. The panel on the right ties into that top row of uppers and the base cabinets below.

In this next pic, we see the row of uppers coming off that finished panel and running into the cook top hood. The wall behind the cabinets is curved and the cabinets are fitted together on angles. You can see the light rail and the crown in this pic. You can also kinda see the detail in the doors. This
set of cabinets features square pieces of wood in each door corner to add dimension to the surface. These doors are also considered pillow doors because the center area pillows up and sits higher than the frame itself.

The next photo shows the hood above the range. This piece by itself is extremely majestic and pulls the eye upward. It's arguably the best part of the Kitchen. We installed it in two
parts. The base will hold the cook top hood and the upper cabinets will have shelving and cover the lines running to the range itself.

Now you can see the far right of the uppers. There are more angled uppers off of the hood and then there's the cabinet that will house the oven and the microwave. With the exception of one missing upper, the two sides could almost be mirror images of each other.
The cabinet on the end with space for the appliances is also built around two panel sides.

Here I'm attempting to show you the lowers. The center base cabinet will be where the cook top is installed. On either side you can see turned posts. These posts actually hide two slide drawers that contain spice racks. The cook top itself will sit on that lower cabinet; which can be used to store
cooking accessories.

Finally, I wanted to give you a closer view of the island. I realize it's only the outside, but I couldn't get a very good angle to take something on the inside. You can see the Corbels under the granite and the giant panels wrapping around the unit. It hangs over the back enough to create a breakfast nook if you put some stools right there. And that's pretty much the house. I took a
couple of other pics I wanted to show you.

This is the house from the outside. It's quite lovely and as you can see from the entry area covered in stone, we had to provide some base that was curved for these areas. The base turned out wonderful and the home is just magnificent. I wanted to take a pic of the community, but every pic I got turned out bad. About the only one I
took to show you their views is the next one.

This is the view from the front door. They're right up against a beautiful mountain range.

If you're interested in learning more about the cabinets in this home or want to get something similar in your own home, you can read more about the company at http://www.goodwinmillandcabinet.com. Visit the site and set up and appointment to get your work done today.