This is a picture I think we've used before, but this next post was actually kind of a vacation for the brothers. A magazine called "Camping Earth" published an online article referring to our trailer. It created quite a buzz and our website started getting a lot of hits. Chris used this entry to answer some questions we'd received. I feel inclined to reprint them just in case any of you have similar questions.
One reader wanted to know how we were cutting our plywood panels. And Chris said, "We cut our plywood panels with a jig saw. We cut the first side and then used it as the pattern for the second side. We then lined them up and screwed them together so that we could use a belt sander to even them up. We were very careful to cut slowly and stay on the outside of our line. This allowed us to sand to the line making two perfectly matched sides. It isn't rocket science though. If you make a mistake just take a little more off the pattern, no one will ever know."
Another reader inquired about the completion date and Chris said, "Thanksgiving through Christmas is our busy time. We don't really have time to work on our own stuff until the holidays are over. We are going to get it licensed before the first of the year. We have a short list of things we still want to do but none of them would keep us from using the trailer. We will put pictures and commentary about future trips. Again, thanks for your interest.
So we had some people following the progression of the trailer. I was recently contacted by a magazine asking if we'd be interested in posting the story in their online publication. That's pretty exciting.
On a sour note, I was recently informed the trailer is currently out of commission based on a car accident. However, the brothers have vowed to fix it up and get it back on the road.
Come back soon for another entry soon.
Back again with another installment of the teardrop trailer story. The next bit of movement on the trailer was hinging the front trunk and strapping it down. The first pic shows the trunk after it was attached. At this point, it had been a couple weeks and the boys hadn't been able to do more work because they had other commitments.
This actually completes the outside of the box and really everything that goes on the outside of the trailer. There were a few things underneath the trailer that needed to be completed, otherwise you're looking at the finished product aesthetically.
This is a close up pic of the strap buckle. The boys made these straps from belts. It was a rather amazing process watching this trailer being built and seeing how they put in all these amazing touches.
As always, it's important to share a link with anyone who admires our workmanship. Goodwin Mill & Cabinet is a company on the forefront of craftsmanship. We're constantly trying to be innovative, fresh, exciting and new. Through our specialty pieces and custom design work, we're always challenging the accepted methods of cabinet making and trying new things. This teardrop trailer is just an example of the innovation happening in our shop.
We want to offer our clients the options they want at a good price. The best way we know how to do that is to continue to learn new ways to manufacture our product, stay open to new designs and create new products to accommodate our customers needs. Don't hesitate to visit our site and submit your feedback. We look forward to hearing from you. Visit us on the web at Http://www.goodwinmillandcabinet.com
It's been awhile since we updated the story of the teardrop trailer and in all actuality, the trailer is finished and has seen a lot of use. But there are still a lot of people looking at the blog posts of this trailer and so we decided to finish the story for you. Of course we continued to chronicle the construction of this unique trailer and I'll describe what the pictures are showing us.
At this point, the boys covered the top of the trailer with Durabak Truck Liner. It was messy and as you can see, it wasn't the most professional job but it looks nice. One of the benefits of this material is that it was extremely forgiving. They were able to cut off some bad spots and touch it up. Over all, the boys were happy with the results. The next step is hinging the front trunk and weather stripping it. They also plan to attach buckles to keep it closed. This will allow them to mount the battery permanently and hook it up.
This side view gives you a pretty good idea of how the trailer looks. You'll have to forgive the look of the shop. Around that time, we had a storm blow through and it blew all the sawdust out of the bins into the lot and the shop itself. Then it rained so everything is a sopping mess.
The rear view shows the trunk all completed. The boys let the Durabak dry over the previous weekend and then weather stripped the inside. And not soon enough considering the storm that came directly afterward. There's a short punch list of things to complete but it's close enough to being finished that it can pass inspection and get licensed. The boys actually pulled it the other day and it tracks very nicely. At this point, everyone wanted to take it on a trip. But since winter was setting in, it wasn't exactly the best time to go camping.
Tune in and we'll continue and finish the story of the teardrop trailer!
And remember to check us out at http://www.goodwinmillandcabinet.com for more information about the company and our products.
Someone recently asked me, "Why are there such big price differences in the [cabinet] bids I've received?". I've given that question a lot of thought and I wish I'd responded more precisely.
I've talked about the competitive building market before, but I'd like to re-address the topic today. Mainly because there are still so many companies out there who are willing to work for virtually nothing just to get a job. There are dozens of shortcuts you can take to minimize the cost on your bid. Like many other areas of construction, the cabinet maker makes money on upgrades. Most will bid the job low and try to catch more money as they sell you finish, design, hinges and drawer upgrades.
The temptation is to buy the cheapest cabinets you can once the bids come in. But it's important to remember, when you buy the cheapest, you're usually also buying the cheapest quality. As far as resale value, Kitchens are the easiest way to insure the best price down the road. However, if you're want to live in your house and don't consider selling it, you should still consider a better quality cabinet as they last longer and you don't want your cabinets splitting apart or feeling rough after you pay for them. Ultimately, going cheap in the short term can cost you big time in the long term.
There are cabinet makers who offer a quality cabinet for a lower price; but again, I want to point out those lower prices usually come attached to lower quality materials. So how do you know if the guy is overcharging you for low end stuff, or keeping his costs down by skimping on the materials?
These are some of the ways you can tell if a cabinet maker is giving you a low quality cabinet.
First, you'll want to see an example of work before you hire them. The eyes are the first line of defense. If it looks run down and bad, chances are; it is. Reach out and touch a finished side of the cabinet, if it feels flat and smooth than the cabinet maker is using a better quality finish. A custom Cabinet maker will almost always use a higher quality material. Pre-manufactured cabinets are produced using thinner materials.
Second, pay attention to the layout. If you're not using a bid service to create a layout for cabinet makers to bid, you'll get a variation in layouts from the different companies you get bids from. Some will design a layout that is functional and makes use of the space provided. A bid from a cabinet maker who is only interested in providing the lowest cost may produce a layout that is cheap, but not practical.
Drawer banks are more expensive than shelf banks. A great way to save money when you're bidding a Kitchen is to cut out the drawers. If your layout is missing drawers, you know their only interest is the price.
Another shortcut cabinet makers will take is minimizing doors. Sometimes a cabinet is too big for one door. The hinge isn't made to support the weight, but one door (even if it's bigger), is cheaper than two. This is an area where you run the risk of having doors falling off their hinges over time.
One of the best ways to get a fair idea of what a cabinet maker really offers is to level the playing field. You can hire a cabinet bidder to design a layout. You go through the process of picking out where you want your drawer banks, and what cabinets you want in different areas. You can also pick out the wood species you want and even decide what kind of finish you want, i.e. stain, glaze, paint...
Now, take the design with all the specifications and collect your bids. With the option of only bidding for what's already been decided, you can gather together a comprehensive idea of which cabinet maker will offer you the best deal. Without taking shortcuts.
A lot has happened since I last wrote. We've been so busy I haven't had time to sit in the office and put some stuff together for the blog. In fact, I haven't had much time to take pics and show you some of the exciting things we're doing.
Let me talk about the trends we're seeing in woodworking. This past year we've seen a rise in paint jobs. Paint jobs are cabinets with paint finishes rather than stain or glaze finishes. In some ways, a paint finish is harder to do because paint surfaces are less forgiving than stain or glaze. Stain and glaze surfaces are accentuated by the natural color changes in wood and small imperfections, (especially discoloration), can be easily covered up.
Paint surface can't have small nicks and dings in it. It needs to be flat for the paint to be consistent. So there's some prep work involved in making sure the surface is flat and smooth. This is usually accomplished through sanding. However, if there are places where deep nicks are present, we use a wood putty or bondo to fill it and then sand again until the surface is completely level.
I think a paint finish would be harder to keep clean as well. Because the surface is rather unforgiving and any flaw is highly visible. If you have children, painted finish will really show every tiny imperfection.
On the other hand, paint finishes offer people something more traditional finishes can't. The color options are far more varied. You have the ability to match your cabinets to other color schemes more successfully with a paint finish. Your cabinets can become part of your color scheme rather than merely a color compliment.
And I think this, more than anything else is why paint finish is becoming so popular.
We've invested in a new CNC router. I'm sure you remember reading posts about our router a while back and I'm pleased to announce, the router made a huge difference in our ability to produce work. We've increased our output by leaps and bounds. We've also hired additional crew to handle the increased amount of work we're producing.
In addition to hiring new crew, we've said goodbye to some as well. We saw one of our long time employees retire last year in September. That was quite a milestone as we haven't had someone retire with the company in years. We wish John continued success in all of his endeavors and look forward to seeing him from time to time when he stops in to say hello!
We've done other things this year as well. We've redesigned the shop and moved equipment around to facilitate a more productive assembly line. We have areas designated as holding areas for different things like doors, drawer boxes and cut material. As we refine our prep process, we increase the speed with which we assemble boxes and stage them for delivery.
Right now we're working on ways to increase our productivity even more.
I'll try to post some new pics soon and you can check out some work we're doing around town. Thanks for sticking with us and keep checking back with us.
It's been another busy week at Goodwin Mill And Cabinet. These are some final pics of the Cannon residence. We went by to change some hinges and finishing some punch list items. All of the hinges are now soft close. For those of you who don't know, upgraded soft close hinges gently close your doors and drawers. They take over and finish the job once you've closed it a portion of the way. It also prevents slamming doors or other rough handling. They're pretty cool and I think Cannon's will be happy they decided to upgrade.
The first two photos I will share are both of the library. The first pic shows the bookcase. They've already started filling the shelves, but I love that because you can see how functional and nice the shelves are. The second pic shows the desk we built in and more shelves above in a two piece unit. Put in a small rubber mat and a chair and you'll have an excellent computer area.
These next two pics are both of the guest bathroom. As you can see, there's the vanity and a drawer unit, but there's also a taller cabinet attached to the base units. This shelf unit is probably
for storing towels or even clothes. You could also fill is with tissue or other cleaning products. No matter what you fill it with, it was a great idea and I like the way it creates a step on the counter top.
The next pics I wanna show you are some of the Kitchen photos. I took a lot of pics here, but the lighting was bad and most of them didn't turn out. For example. The first pic I took was of the island. As you can see, it's very dark even with the natural light coming in through the window.
The next photo shows the full kitchen, however, like its counterpart, it's quite dark. Still you can see how much different it is from the previous pics I've shown from this house. Especially the hood.
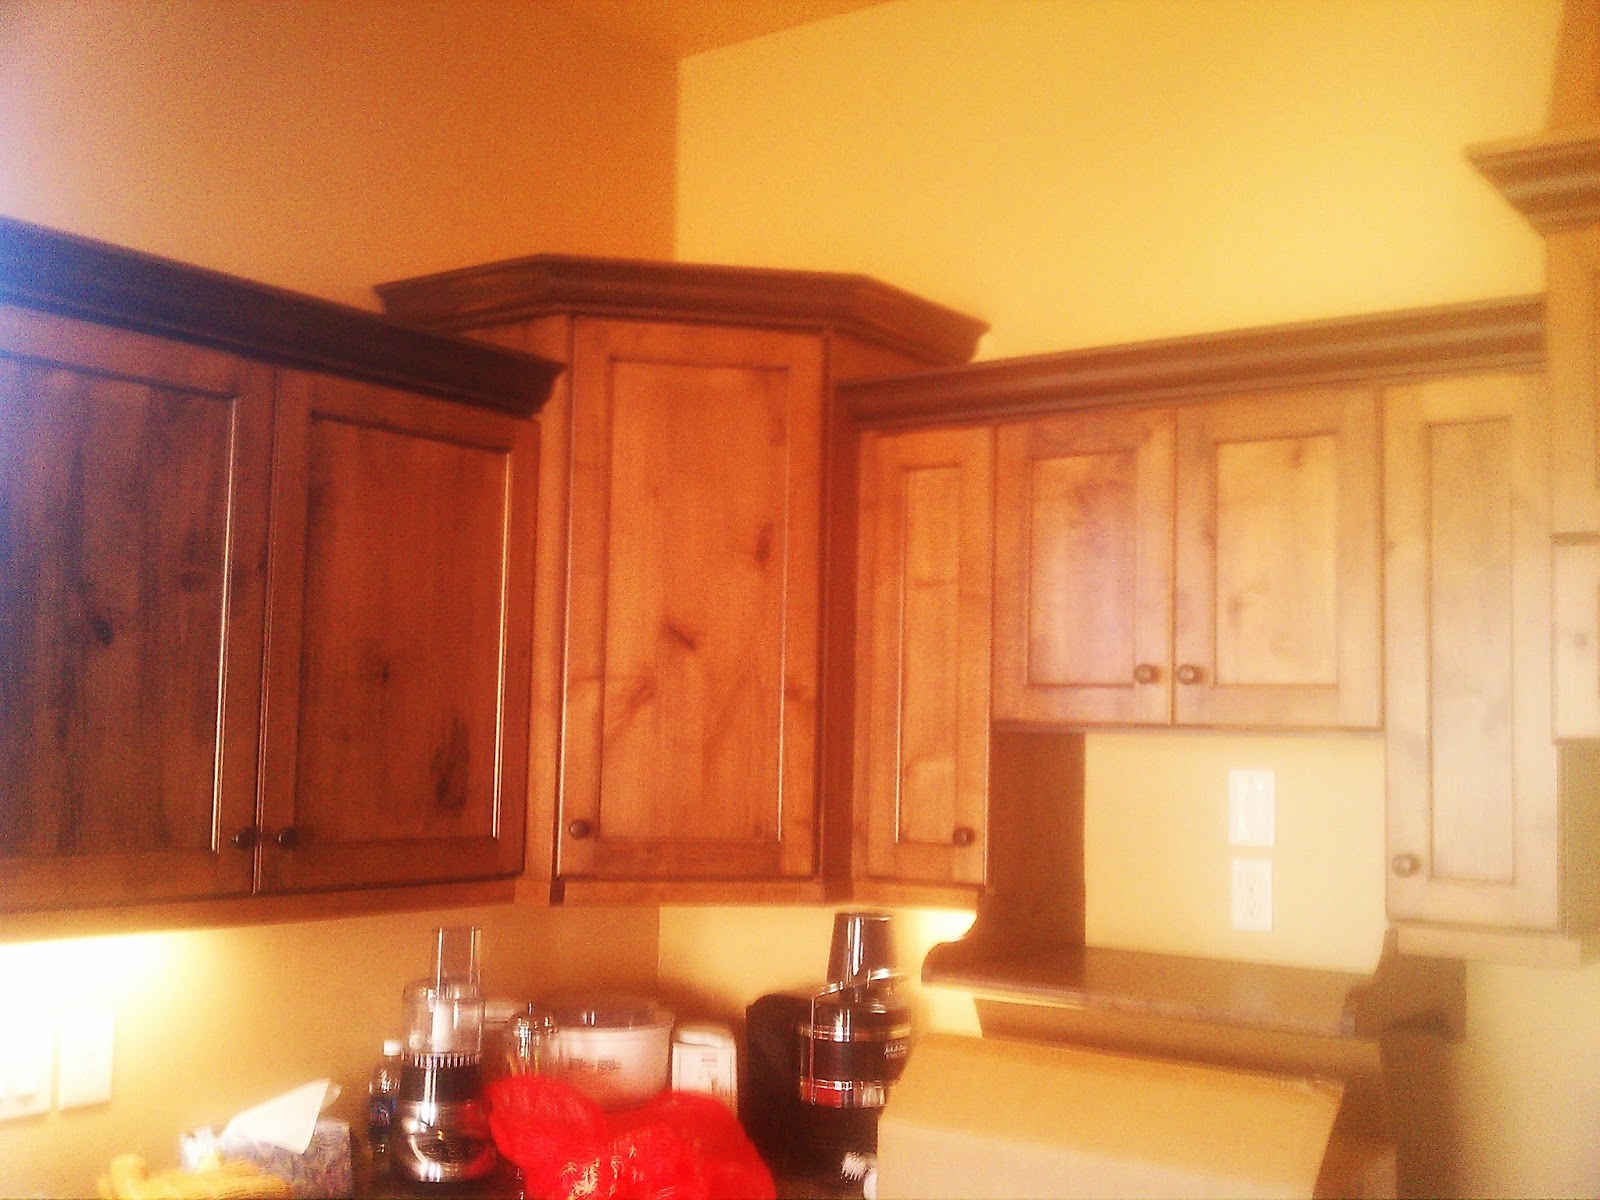
Here's the center upper. This corner cabinet is an upper lazy susan and you can also see the microwave shelf we added. You get a good view of the uppers on either side of the corner cabinet. You can also see some of the small appliances and boxes already loaded into the kitchen.
This pic shows the cabinet over the refrigerator. The fridge was delivered fits perfectly in the space we built for it. It's very handsome and the accented crown molding helps to bring out the darker colors of the appliances. The fridge cabinet juts out a little more than the rest of the uppers. It's also a little taller. In the case of this kitchen, that helps out a lot with the additional hood top we added. I'll show you that in the next pic.

Originally, the lower part of the hood was all we built. The line was supposed to come out of the wall and into the back of the cabinet. Unfortunately, when we delivered the job, the line was coming down from the ceiling and we needed to produce an additional piece to cover it. We worried that covering the line all the way to the ceiling would through the alignment of the upper cabinets off and create a disproportionate look in the kitchen. Fortunately, this didn't turn out to be the case. The hood top looks quite regal and gives the upper bank a rich appearance.
This photo shows the interior of the Kitchen island. I've got another pic of this unit further on, but I wanted to show the functional cabinets first and the shelf unit afterward. By now, the granite counter top was installed so you can see how it blends with the finish on the cabinets.
Here's the corner below the lazy susan cabinet. To the right you see the stove and to the left, there's the dishwasher. That cabinet directly left of the stove is a spice cabinet. The corner unit is a drawer unit. An interesting location, but one that is aesthetically pleasing.
This bank of lower units is on the east wall. The cabinet furthest right is the sink cabinet and sits next to the dishwasher. The cabinet to the left of it is the trash bin. It's a pull out trash cabinet! These units are so cool.
Here's another addition we did to the Kitchen. They needed a space for the microwave, but it wasn't included in the original plans. We built this open back shelf to hold the microwave.
Here's another pic of the island cabinets. This one sits on the south side of the island and is a basic shelf unit. It's finished on the inside because it sits open and the shelves are also finished. I thought this was a great addition to the look of the island. You don't see open shelf units like this very often, but when you do, they always provide a wonderful variation that helps create a unique look.
These two sets of uppers are to the left of the east window above the sink. Sadly, I wasn't able to get a good shot of them. It was raining on the day I took these. But when I tried to catch the pics, the sun came out and just dazzled the interior of the house.
The final pic from Cannons is the master bathroom. This double sink bank looks amazing with the counter top in place. I love the way the granite and tile came together to create a blended color throughout the entire room.
Last week, Goodwin Mill And Cabinet, also delivered and installed a job in the Dixie Springs area for Rock Solid! For those of you who follow my tweets, you'll know all about this because I tweeted the progress of the job all day.
I also posted some pics of the cabinets after we delivered them on our Facebook page. For the sake of continuity, I decided to post them here as well and give you the chance to see them.
We hauled all the cabinets into the main area adjacent to the Kitchen and set them there first. Then we started moving them into position. The second pic shows the cabinets I'd moved into the master bath. They're set up and ready to be installed.
 This final pic shows the upper cabinets in the Kitchen staged and ready to go up. We usually start in a corner and work our way out. But all the uppers are laid out before we set the first one.
So that's about it right now. We're already assembling two more jobs and getting ready to deliver as quickly as possible. We should have another Rock Solid job delivered and installed before the week is out as well as a couple smaller jobs. Goodwin Mill And Cabinet is moving right along, but we've got plenty of time to add your work to our schedule. Call today and set up your appointment to design your cabinet layout! Then, choose Goodwin Mill And Cabinet to build your cabinets! We're ready to go to work!
Happy New Year from Goodwin Mill And Cabinet! We have some jobs running in the shop right now including one already loaded in the truck for delivery. And that's exciting, but I'm going to use my time with this blog to talk about a job we did early this year. I was going through my camera and I found these pics of the Colbert job and wanted to show you more of how this spectacular home and the incredible woodwork we produced for it.
 The first photo is of the downstairs bathroom. This was a double vanity unit with drawer banks on either side and one in the middle. Colbert's used a dark stain and mixed it with a delicate white color contrast. It looks really good when you see them together.
This fantastic piece is the fireplace in the living room. There's a mantle and the cabinets on both sides are made for storage. The next pic is a close-up of the right hand unit and gives a better view of the cabinet.
Here you can see the shelf units that are on the top of the cabinet have doors with glass panels. The lower portion is also shelf units and will probably hold entertainment materials like dvds, blu-rays, etc. You may also notice the bench below the mantle doesn't have a top in these pics. I can't remember what material they used on that. I think they did granite or tile.
The first photo is of the downstairs bathroom. This was a double vanity unit with drawer banks on either side and one in the middle. Colbert's used a dark stain and mixed it with a delicate white color contrast. It looks really good when you see them together.
This fantastic piece is the fireplace in the living room. There's a mantle and the cabinets on both sides are made for storage. The next pic is a close-up of the right hand unit and gives a better view of the cabinet.
Here you can see the shelf units that are on the top of the cabinet have doors with glass panels. The lower portion is also shelf units and will probably hold entertainment materials like dvds, blu-rays, etc. You may also notice the bench below the mantle doesn't have a top in these pics. I can't remember what material they used on that. I think they did granite or tile.
 These next two pics show the vanity/drawer units in the bathrooms of the children's bedrooms. They sat back to back and are mirror images of each other. This is the bathroom with the cabinets sitting on the south wall.
These are the cabinet's sitting on the north wall. They were interesting and I loved the way the two rooms were set back to back. Very cool idea and the matching bathrooms was also inventive.
Ok, this next pic is a little tricky because I can't remember where this bench unit was in the house. We had a series of similar benches done in the laundry room. They were part of a coat rack system, but this is not part of that. If I remember correctly, I think this was downstairs somewhere.
This is the master bath. Full length units at either end, connected to vanities on both sides and in the center, you have a drawer bank shared between the two sinks. In this photo, I wanted to show you the full unit, but I couldn't fit it all in one shot.
This next pic shows you a better glimpse of the full length units. This one stands at the far left of the base unit. I didn't take too many shots of this unit just because it was hard to get an angle. As you can see, it turned out great. These cabinets will hold a lot of storage. From clothes to towels. They compensate for fewer drawer banks in this bathroom.
There are a couple more pics of bathroom cabinets I wanted to show you, but both of them are separate from the vanity bank you saw in the previous pics. The first is this small wall unit. This cabinet is located in the toilet area adjacent to the main bath. It's perfect for storing toilet paper and other odds and ends including cleaning materials, bowl sanitizers and air fresheners. I especially love the little drawers on the bottom of the unit. They are functional and pleasing to look at.
This final cabinet is located just outside the main bathroom area. There is a small hallway and this full length linen closet sits in the wall. As you can guess from the name of the cabinet, this shelf unit is used mainly for storing linens. Sheets, blankets, pillow cases... Even towels are often stored in these. It fit perfectly in the recessed space created for it and I love the way it looks right next to the bathroom.
The next set of cabinets I want to discuss are in the master bedroom and were all along the west wall. That particular wall had a fireplace and I just love the way the cabinets were designed and fit into the space.
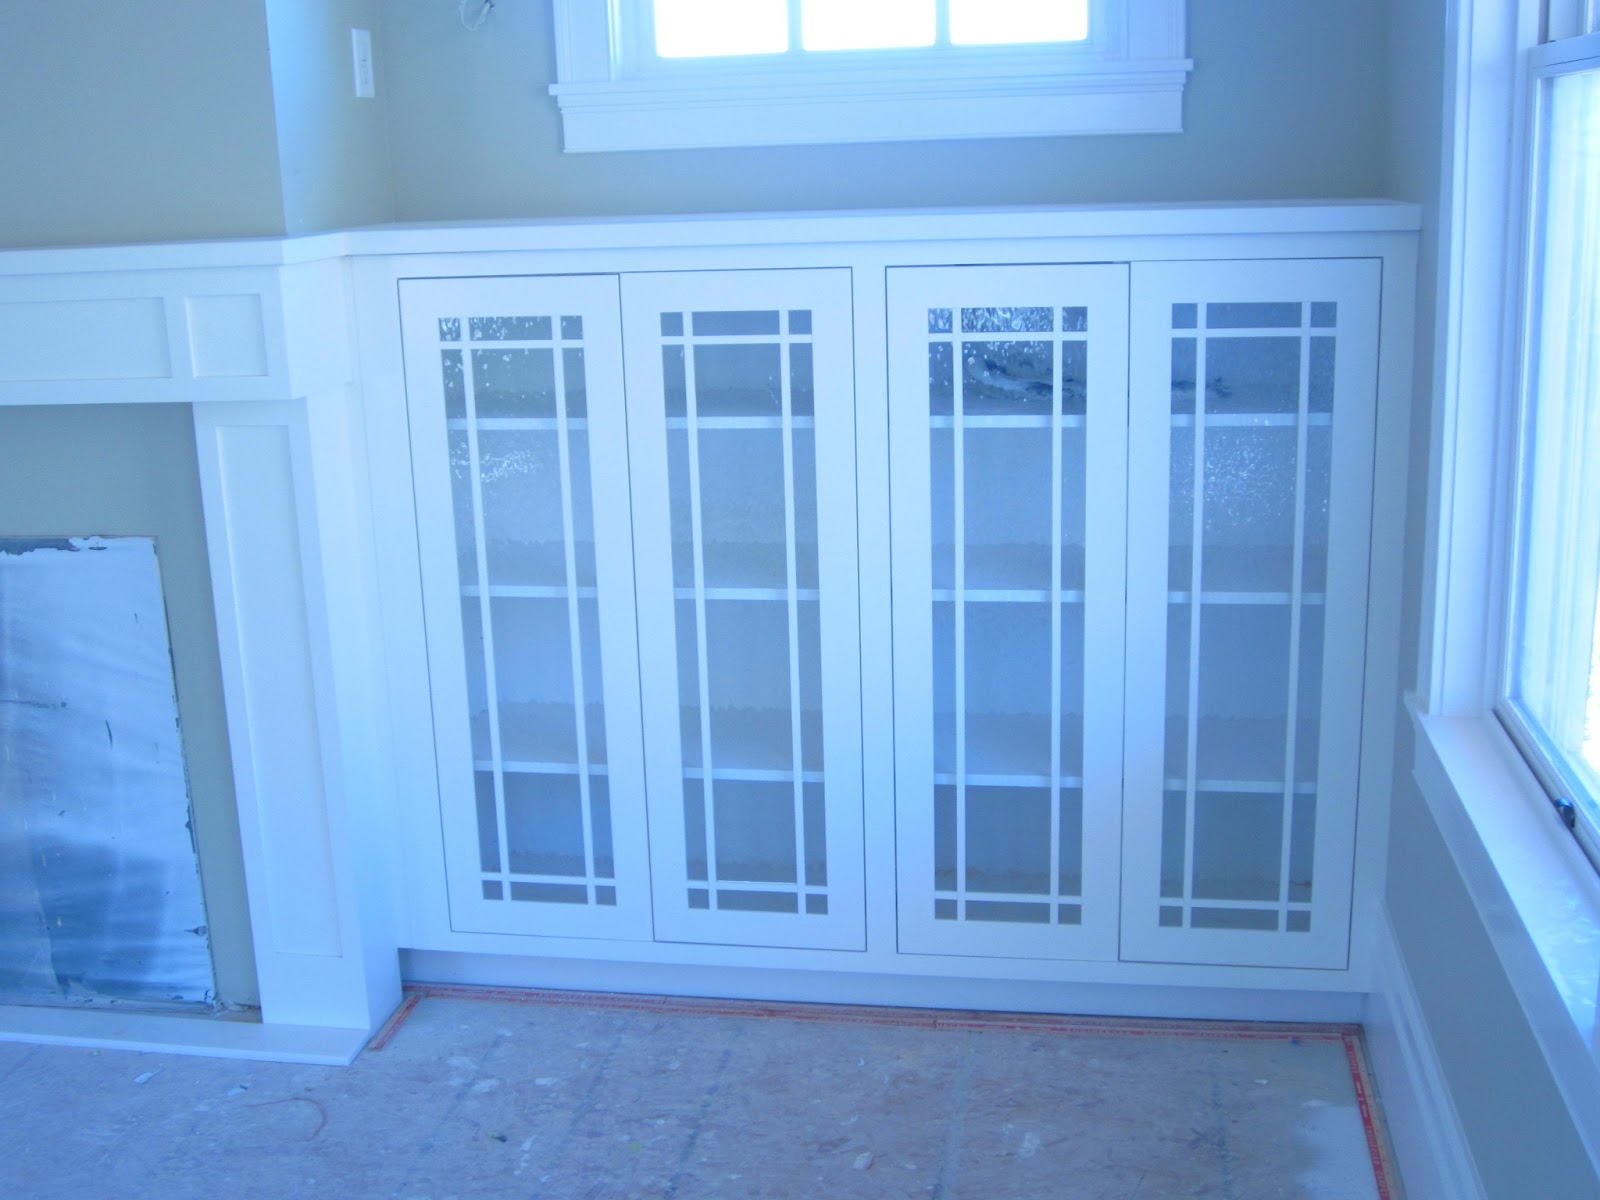
As you can see in the first pic, the cabinets start off with a set of 2 cabinets. Both have two doors with glass panels and are shelving units. The glass makes the shelf space perfect for display.
The center portion is the fireplace area and features some creative molding work and a mantle. The photograph afterward shows the next two cabinets are exactly like the ones in the first photo.
Here's a full shot of the entire wall so you can see how it all fit together. I also thought it was cool that the cabinets create shelf space. The mantle also has some limited shelf space available. Not much, but a little.
This is the final pic I have of these cabinets. As you can see, in this shot, I tried to get an angle pic to show how deep the mantle came out and how much shelf space was actually available. It ended up looking awesome and totally fit in with what they were trying to achieve with their cabinets in general.
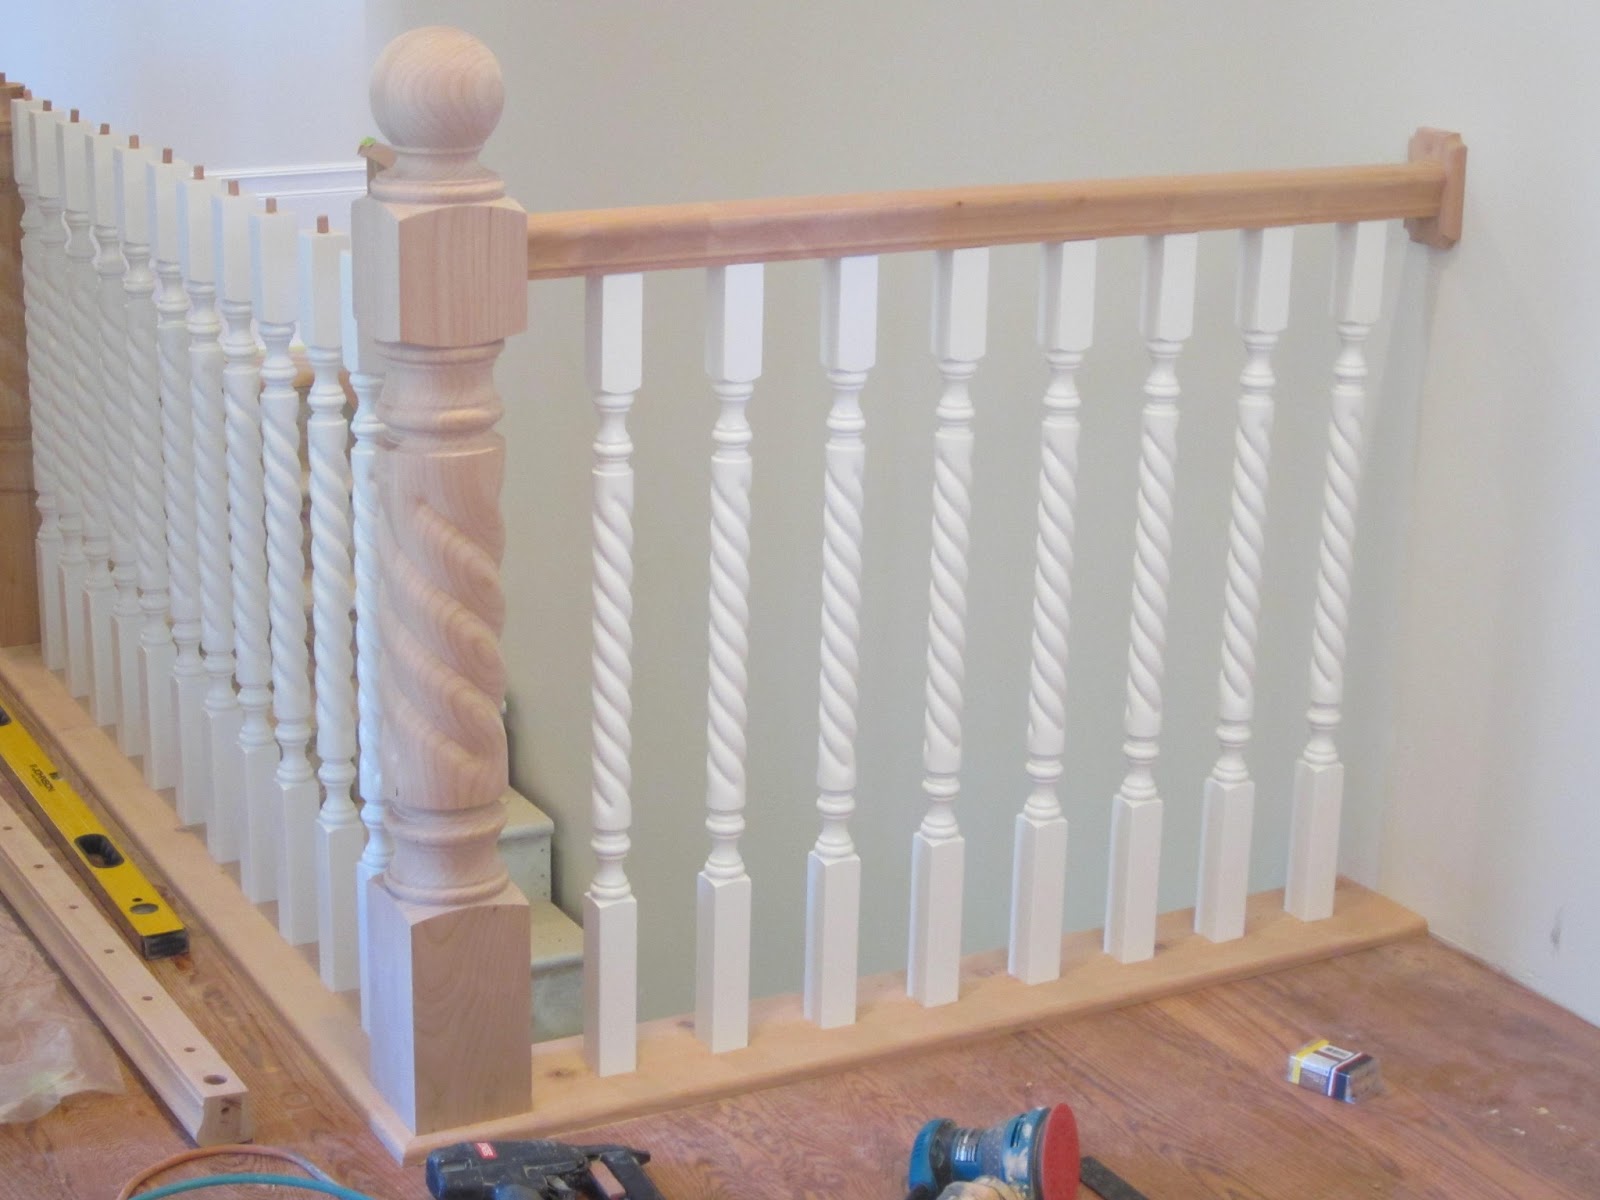
We also supplied a lot of the molding and trim for this job. These posts and railings are all from the shop as well. Of course, since this time, our post guy has gone into business for himself and we buy our stuff from him.
Still, I think the posts all turned out perfectly and though we didn't install them, I really wanted to show how diverse the wood working is we were creating at the time and how talented some of our craftsman are.
The last photo I will show you today is the snack bar area downstairs. I'm not sure it's actually a snack bar, that's just what the owners referred to it as. Three shelf upper units and two shelf base units with a drawer bank in the center.
Well that's all the pics I have that turned out. There were more pics of that incredible home and when I find more, I will certainly take the time to show them to you. Colbert's are an awesome couple! They were a pleasure to work with. I was impressed with the attention to detail they both possessed. That's one of the things I like best about working at Goodwin Mill And Cabinet. It's exciting to help someone build the home they envision in their minds. It's incredibly satisfying to watch someone create something and see it brought to life by our craftsmen. Goodwin Mill And Cabinet is ready to do that for you. Call today to set up your appointment and we'll get to work for you!
These next two pics show the vanity/drawer units in the bathrooms of the children's bedrooms. They sat back to back and are mirror images of each other. This is the bathroom with the cabinets sitting on the south wall.
These are the cabinet's sitting on the north wall. They were interesting and I loved the way the two rooms were set back to back. Very cool idea and the matching bathrooms was also inventive.
Ok, this next pic is a little tricky because I can't remember where this bench unit was in the house. We had a series of similar benches done in the laundry room. They were part of a coat rack system, but this is not part of that. If I remember correctly, I think this was downstairs somewhere.
This is the master bath. Full length units at either end, connected to vanities on both sides and in the center, you have a drawer bank shared between the two sinks. In this photo, I wanted to show you the full unit, but I couldn't fit it all in one shot.
This next pic shows you a better glimpse of the full length units. This one stands at the far left of the base unit. I didn't take too many shots of this unit just because it was hard to get an angle. As you can see, it turned out great. These cabinets will hold a lot of storage. From clothes to towels. They compensate for fewer drawer banks in this bathroom.
There are a couple more pics of bathroom cabinets I wanted to show you, but both of them are separate from the vanity bank you saw in the previous pics. The first is this small wall unit. This cabinet is located in the toilet area adjacent to the main bath. It's perfect for storing toilet paper and other odds and ends including cleaning materials, bowl sanitizers and air fresheners. I especially love the little drawers on the bottom of the unit. They are functional and pleasing to look at.
This final cabinet is located just outside the main bathroom area. There is a small hallway and this full length linen closet sits in the wall. As you can guess from the name of the cabinet, this shelf unit is used mainly for storing linens. Sheets, blankets, pillow cases... Even towels are often stored in these. It fit perfectly in the recessed space created for it and I love the way it looks right next to the bathroom.
The next set of cabinets I want to discuss are in the master bedroom and were all along the west wall. That particular wall had a fireplace and I just love the way the cabinets were designed and fit into the space.
As you can see in the first pic, the cabinets start off with a set of 2 cabinets. Both have two doors with glass panels and are shelving units. The glass makes the shelf space perfect for display.
The center portion is the fireplace area and features some creative molding work and a mantle. The photograph afterward shows the next two cabinets are exactly like the ones in the first photo.
Here's a full shot of the entire wall so you can see how it all fit together. I also thought it was cool that the cabinets create shelf space. The mantle also has some limited shelf space available. Not much, but a little.
This is the final pic I have of these cabinets. As you can see, in this shot, I tried to get an angle pic to show how deep the mantle came out and how much shelf space was actually available. It ended up looking awesome and totally fit in with what they were trying to achieve with their cabinets in general.
We also supplied a lot of the molding and trim for this job. These posts and railings are all from the shop as well. Of course, since this time, our post guy has gone into business for himself and we buy our stuff from him.
Still, I think the posts all turned out perfectly and though we didn't install them, I really wanted to show how diverse the wood working is we were creating at the time and how talented some of our craftsman are.
The last photo I will show you today is the snack bar area downstairs. I'm not sure it's actually a snack bar, that's just what the owners referred to it as. Three shelf upper units and two shelf base units with a drawer bank in the center.
Well that's all the pics I have that turned out. There were more pics of that incredible home and when I find more, I will certainly take the time to show them to you. Colbert's are an awesome couple! They were a pleasure to work with. I was impressed with the attention to detail they both possessed. That's one of the things I like best about working at Goodwin Mill And Cabinet. It's exciting to help someone build the home they envision in their minds. It's incredibly satisfying to watch someone create something and see it brought to life by our craftsmen. Goodwin Mill And Cabinet is ready to do that for you. Call today to set up your appointment and we'll get to work for you!