Showing posts with label Goodwin Mill and Cabine. Show all posts

Monday, December 8, 2014

THIS IS HOW YOU DESIGN A KITCHEN....


Goodwin Mill and Cabinet here and today we're taking you on an in depth look at the steps a cabinet designer goes through to create cabinets in your new home.  So sit down for a bit, browse the pics below and read all about how cabinets are designed!


 The very first thing you need is a blueprint.  A plan.  This particular plan was loaded will all kinds of instructions, but we've edited out all of them and left only information that is important to the design behind.  The plans give us a lot of information we need when we start designing.  It tells us where the appliances need to go and what kinds of appliances are going to be in that kitchen.  For example, this kitchen calls for a sub-zero refrigerator.  The standard size for home refrigerators is 36".  This one is calling for a 48" space so we know it's a sub-zero.  We also know roughly where other things like plugs and pipes are going to go because of where the architect puts the sinks, etc. etc.

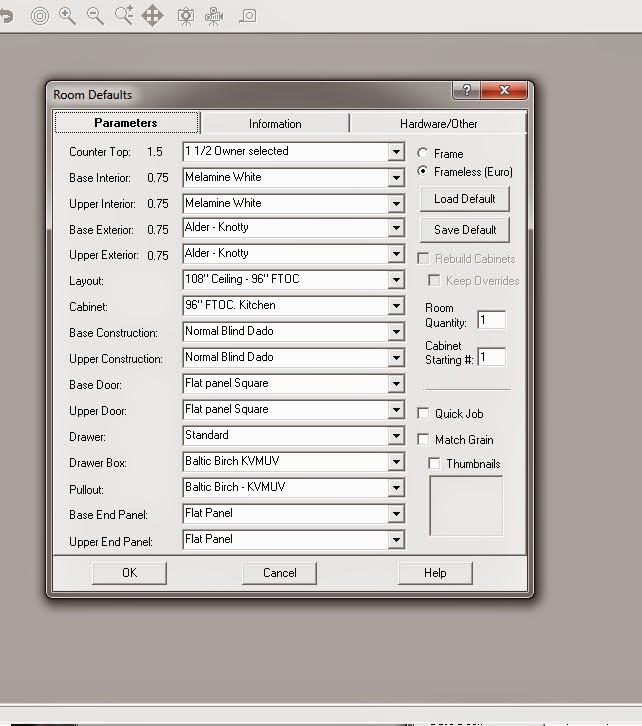
We're ready to begin.  So after opening our cabinet design software, we immediately open a new room for editing and specify all of the parameters we can.  For example, the owners of this home have chosen to use knotty alder wood for their cabinets.  You can see some of the other details as well.  At this point, we want to get as much information entered as possible.  If the buyer has picked out a stain and finish color, we can enter that here.  If they've picked handles and knobs we can add those as well.


 Next, we need to identify which walls we're going to reproduce and do a rough outline of the work space.  we know which walls we need to reproduce based on which walls are supporting cabinets.  In this kitchen there are three with an additional island wall we will have to build.  I've used red arrows to point to the walls we need to duplicate in our design and I've set up three walls that roughly resemble the walls we need.


Now that we've made the rough figure, it's time to get technical.  Using a ruler and the blueprint scale, we determine the exact length of each wall and we edit our drawing to reflect it.  This is also the time we add anything in the wall that could conflict with cabinets; such as windows, doors, etc. etc.  Of these three walls, only one has a doorway.  We've identified it on the plan and added it to our drawing.  Right now, our drawing reflects the architects exact design of the space.  Keep in mind, once the home is built, we may have to adjust some of our figures.  Framed walls don't always end up exactly the same length as they do on the plan.  We need to be able to adjust for real space before we start building the cabinets.


 There is a fourth wall in this kitchen and using the dimensions specified on the plan, we can plot out where that wall will go.  In this next picture, you can see the island wall is added.  Once again, using a ruler and the scale from the blueprint, we took one point on the island and measured the distance from it to the two closest walls.  In the case of this house, the south and west walls.  Where those two points connected is where the starting point of our island will be set.  So now we have every surface we plan to build on represented in the drawing.

The next step involves a lot of the same activity we've done so far.  The next step is adding the appliances.  Since appliances; like windows and doorways, can conflict with a cabinet design, we need to map them out before we go any further.  This kitchen has four appliance spaces.  A dishwasher, a sub-zero fridge, a cook top and a cabinet designed to stack double ovens with an additional microwave.  We add the appliances and now we can see where the cabinets will go and what they will be next to.


 And now the fun really begins!  At this point, we need to fill the space allotted for cabinetry.  We run basic base cabinets along the walls and then do the same with the uppers.  Now our kitchen is loaded up.  We have a visual representation of the space and how we will fill it.  It's important to understand two things at this point...  1) This drawing generates a cut list for each cabinet.  Therefore, the drawing helps us tell how much each cabinet will cost in materials.  It will generate a figure for a bid.  2) We will re-design it at least three more times before we have our kitchen.  The first time is now.  We will pull up each elevation and adjust it to make it more functional.  The second time is when we meet with the client.  They will go over the design and we will change it to reflect their desires.  Perhaps they want less or more drawers, or maybe they want to add a mini-fridge.  Whatever they choose, we will change it to reflect their wishes.  The last time is when we get a field measurement of the space.  We will adjust our drawing to reflect the true numbers.  This step won't require redesigning, but it can drastically alter your cabinets sizes and cutting list.


This is an example of quick basic design.  This wall is the island wall.  The dishwasher prevents us from having a meaningful cabinet on the end.  These other two can be similar, but the cabinet in the middle is a sink cabinet and calling for a 36" sink.  Therefore, the middle cabinet needs to be the biggest.  One basic rule of design is to create a functional space.  We try and include at least one drawer bank in a kitchen.  The middle cabinet will be a sink cabinet and the final cabinet can be pretty much whatever we want.  For now, we'll leave it as a standard drawer/door cabinet.
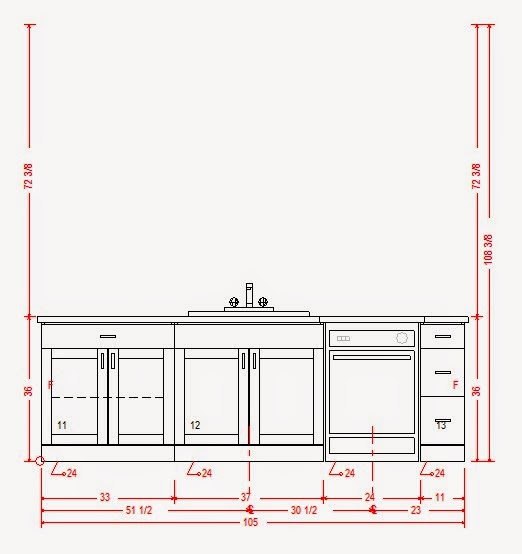

 This pic shows the same wall after we've done some simple design work.  We took the small cabinet farthest right and turned it into a drawer bank.  We made the middle cabinet the largest on the wall, drew in a 36" sink to make sure it would fit and left that cabinet a simple door/drawer combo.  We jazzed up the design, made it more functional, kept the appliance where it needed to be according to the blue prints and overall, improved its appearance.  All of that with just a few simple changes.  But we're not done with the island just yet.  The back of the island needs to be covered with a base wainscoting of knotty alder.  Also, according to the plan, that wall needs to be 42" in height.  This means the owner wants a bar on that side and the counter top will extend out over the island.


So in this pic, we added the wainscoting, raised the wall and extended the bar.  We also gave it that arch, just like it appears on the plans.  Usually, you'd save any counter top work until the entire kitchen was done, but since we were already working on the island, I decided to just finish it up.


 The final task is completing a simple design on each surface.  We won't add a bunch of expensive cabinets like garbage pullouts, spice racks, lazy susans, breadboards or utility closets.  All base cabinets will be the simple door/drawer combo.  We will try to use as few as possible because each additional cabinet increases our bid and right now, we're just preparing for the bid.  High end, more expensive cabinets will be discussed when the client has the chance to go over the plans.  So we've kept it light, as inexpensive as possible and we've followed the plan as exactly as we were able.  Are you ready to see the final result?

This is a 3D representation of the kitchen we just designed.  Notice the wainscoting under the raised bar.  If you look closely, you won't find a great deal of variation in the cabinetry.  But this is the starting point we needed to prepare for the client.  Now, we can submit a bid, meet the client to make changes and begin to order hardware.


 Just for fun, I wanted to show the front of the island so you could see the dishwasher, the drawer bank and the sink.  These 3D renderings are wonderful because you can program them to do all kinds of things.  It can reproduce different stain colors and finishes.  It can also show detail like raised panels on doors.  There is an element of animation in the rendering, but if you can suspend disbelief, you can very easily see what your kitchen will actually look like when it's installed.


There is one final think I'd like to mention about the 3D rendering and that is how much you can learn from it.  Take this pic for example.  Sometimes, when you're putting cabinets together, they don't seem to fit.  You can see how that might be a problem here.  The cabinet over the fridge and the double oven cabinet 25.5" deep while the regular upper cabinets are much more shallow.  If I'd not been able to make the cabinets line up and fit nicely together, the crown molding would have returned back to the wall.  Instead, it cuts back and then cuts left again when the next cabinet starts.  Very clean molding lines means a clean fit for the cabinets in that elevation.

Wow!!!  That's basically all there is to it.  Some plans can be more difficult than others to design.  That usually depends on the architect who designs the space.  We've had some plans with angles and patterns...  Lots of crazy twists and turns.  It does happen, but fortunately, those kinds of plans are few and far between.  We do look forward to them though.  There's nothing more satisfying than designing a cabinet layout for a tricky space.  Especially one the builder/owner likes.


Call Goodwin Mill And Cabinet for your next cabinetry project and let us show you just how amazing cabinetry can be.  Happy Holidays from all of us!

Tuesday, October 21, 2014

THE STORY OF THE TEARDROP TRAILER - PT. 19

IT'S FINALLY DONE!!!  Well, not quite, but they were done enough to start using the trailer.  They registered it the following day after these pics were taken and started pulling it around directly after.  It went with Chris home the very next night and all the final touches were done at his house.
 Installation of the gas lifts was the next step in the project.  Chris did it over the weekend and it fit perfectly on the first try.  The lifts were purchased from a company that had gone out of business and was in the process of liquidating inventory.  They worked great.  He lifted the lid about 12" and the lid slowly opens the rest of the way.  It is easy to put down without any effort at all.  They work better than then the boys ever imagined they would.  
 As you can tell, they had to replace the leather straps on the trunk.  The black genuine leather belt straps broke after the first weekend.  They discovered small print on the belt saying the genuine leather had some man made fibers.  What is really had was a microscopic leather veneer with cardboard interior.  They avoided buying imitation straps the second time.  They also installed some sash locks to pull the lid down tight and keep it secure.
 This is a side view showing how the trailer looks with the trunk complete and closed.  It looks super dusty.  But that's par for the course when it's sitting in the shop.
 The boys installed a lid stay so they could access the box without holding the lid up by hand.  They also put in the battery tie downs so the battery doesn't bounce all over the place.  This pic seems a little strange in it's color because the flash is bouncing.
This is the side view of the completed trailer.  Magnifico!  It looks amazing!  
This pic shows the fold down stabilizers.  There are four, one for each corner.  They will make it nice when the wind blows so you're not rocking all over the place.
This picture shows the undercarriage after it was all sealed with rubberized coating.  They used this coating so it would be easy to re-coat when necessary.

There are still a few minor things left to complete at this stage and they are:
01. Complete the plumbing hook up to the pump.
02. Add a light in the trunk lid.
03. Insulate the ice chest in the front trunk.
04. Complete the oven insulation and slide out.
05. Clean the over-spray off the roof vent.
06. Putty, seal and weatherstrip the door frames.

And that will wrap it up.  Chris commented at this point that all they needed was one free morning and everything would be finished.

For those of you who have read the story, maybe you've been lucky and seen the trailer in Utah or surrounding states.  The boys have taken it all over the place.  They've stopped and given a lot of people a closer view.  They wanted to post a blog about trips they've taken with the trailer.

My next entry will show pics from one of these trips.  You'll be able to see the trailer in action!  Goodwin Mill And Cabinet is where you'll find other amazing craftsman pieces similar to the teardrop trailer.  You can see more galleries of our work and check out more information about the guys who built the teardrop trailer by visiting:


Monday, October 20, 2014

THE STORY OF THE TEARDROP TRAILER - PT. 18

This is a picture I think we've used before, but this next post was actually kind of a vacation for the brothers.  A magazine called "Camping Earth" published an online article referring to our trailer.  It created quite a buzz and our website started getting a lot of hits.  Chris used this entry to answer some questions we'd received.  I feel inclined to reprint them just in case any of you have similar questions.

One reader wanted to know how we were cutting our plywood panels.  And Chris said, "We cut our plywood panels with a jig saw.  We cut the first side and then used it as the pattern for the second side.  We then lined them up and screwed them together so that we could use a belt sander to even them up.  We were very careful to cut slowly and stay on the outside of our line.  This allowed us to sand to the line making two perfectly matched sides.  It isn't rocket science though.  If you make a mistake just take a little more off the pattern, no one will ever know."

Another reader inquired about the completion date and Chris said, "Thanksgiving through Christmas is our busy time.  We don't really have time to work on our own stuff until the holidays are over.  We are going to get it licensed before the first of the year.  We have a short list of things we still want to do but none of them would keep us from using the trailer.  We will put pictures and commentary about future trips.  Again, thanks for your interest.

So we had some people following the progression of the trailer.  I was recently contacted by a magazine asking if we'd be interested in posting the story in their online publication.  That's pretty exciting.  

On a sour note, I was recently informed the trailer is currently out of commission based on a car accident.  However, the brothers have vowed to fix it up and get it back on the road.

Come back soon for another entry soon.