Thursday, July 26, 2012

BRAIN BALANCE ACHIEVEMENT CENTER

 Goodwin Mill And Cabinet recently had the opportunity to do the reception area for the Brain Balance Achievement Center in St. George, UT.  This institution is a place where children with autism or other learning problems can learn how to function more fully.  I'm not sure of all the specifics and I hesitate to say more without reading up on the subject.  The goal of the company is to help kids and that's what I think is important.  Click on the link to their site to learn more about them.
 The first pic shows the reception area as it appears when you walk in the door.  Instead of doing a barback along the back of the cabinets, we did this alternating wainscoting.  Black, white, black, white...  This then becomes the counter space for clients as they arrive and check in.  We ran black base along the bottom of the base cabinets and this wainscoting, but we ran white crown and light rail on the upper units.
 Here's the first of the two upper units.  As you can see by the two pics, both are open shelved pieces and sit on either side of the door.  There's a hanging light somewhat obscuring the first cabinet.
 This one you can see more clearly.  You can see the white crown and the light rail on the bottom of the unit.  The interior of the cabinet is black and the shelves are painted black to match.
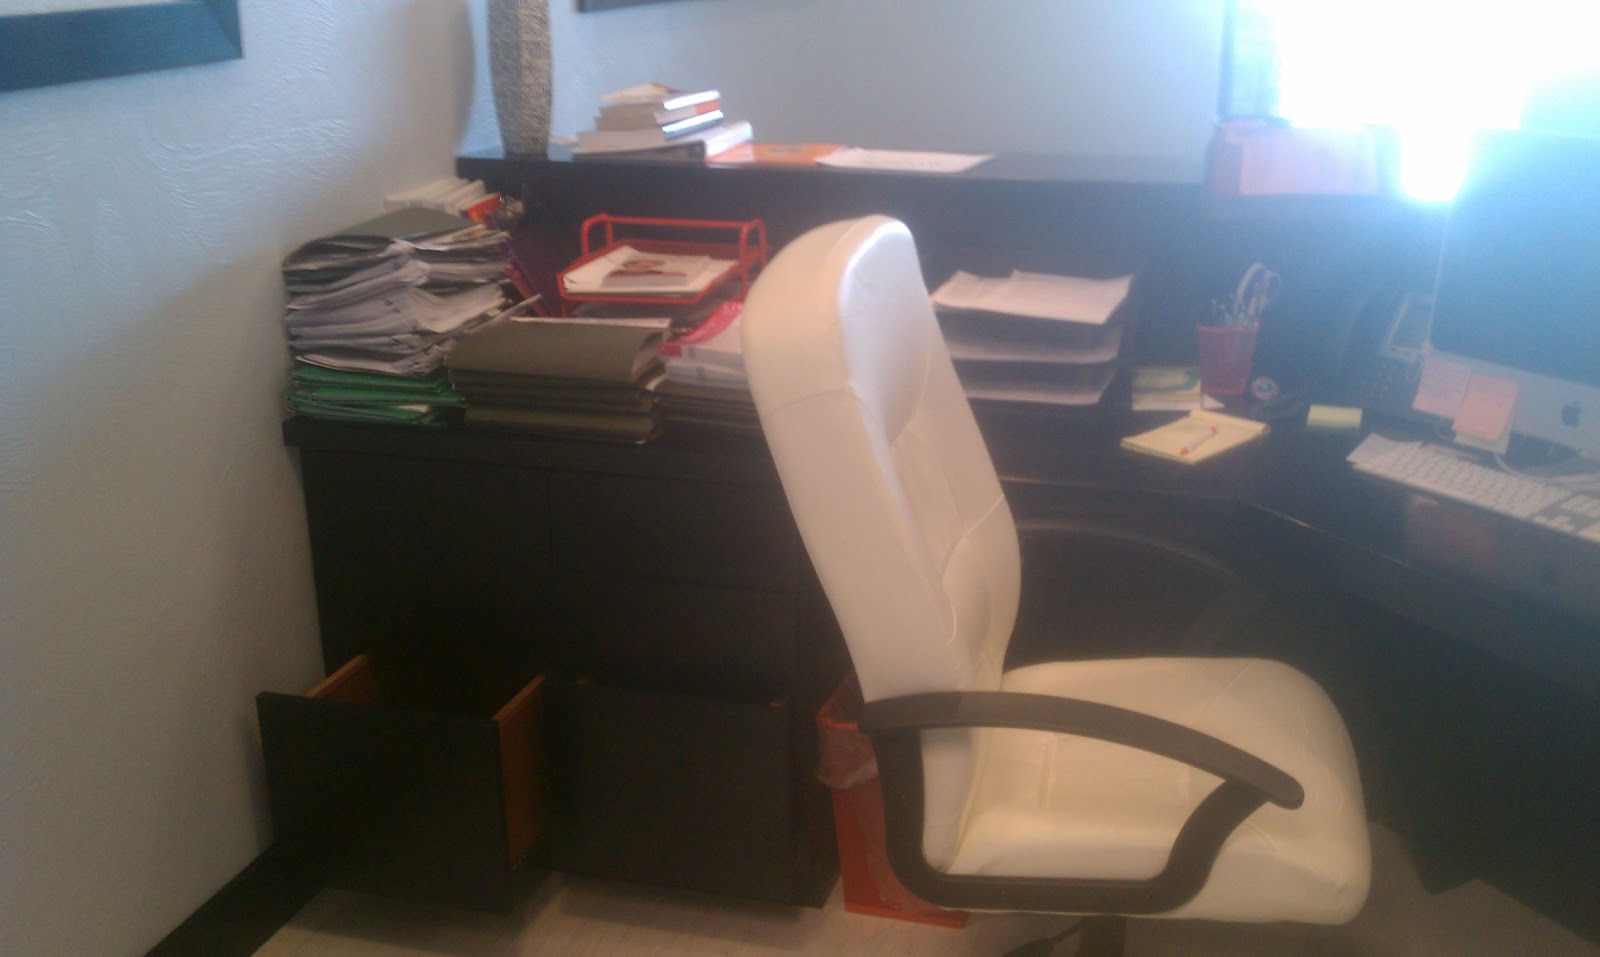
 By the time I got these pics, the center was already open and the reception area was a busy work place as you can see here.  Because the cabinetry is black, you might have a hard time distinguishing between cabinets.  There are basically, two drawer banks behind that chair.  They are go to the wall with another drawer bank on the far right side against the wall over there.
In this photo you see the space between the drawer banks is open below.  It's all desk.  It's interesting to note, they went with a black counter top and a white chair to carry through the color scheme.  Most of the wall treatments and furniture follow along these same lines.  The splashes of color are everywhere and are quite dynamic.  Your eyes are drawn to them.  Even though I think the reception desk is extremely cool, I love the way it blends in the background.  With such dramatic colors, you'd think it would stand out in a shocking way.  But it doesn't.  It's very subdued.  You can see the hand of a professional designer at work here.
It's exciting to do work in homes and business'.  It's especially satisfying to do work for places like this.  Places that do something noble like help kids.
Goodwin Mill And Cabinet is a company geared towards helping our clients achieve their goals.  Call today and let one of our design staff help you envision and achieve yours.

Friday, July 20, 2012

PORTER JOB AT THE CLIFFS

So yesterday I posted a teaser blog about Goodwin Mill And Cabinet doing a job in the Cliffs subdivision for GC Tad Porter.  Today I'm actually going to show you some of the work.  I want to do this in two blog entries though.  This one will show the work in progress and a later one will show the work when it's completed.  Also, I only have pics of the cabinet work that was installed while I was there.  The bathrooms were being worked on after the cabinetry was installed so I couldn't get in to get pics, but you will get to see it.  
 This first photo shows the vanity and flanking cabinets in the Casita.  The open cabinet actually has finished shelves in it and looks fantastic!  The drawer bank is always necessary for bathroom cabinetry.  As I mentioned the other day, the cabinets in the main house are almost all Antique Mahogany color.  The Casita uses the same.
 Now we're onto the kitchen!  This first pic shows an interesting cabinet.  It's actually two tall cabinets built together.  The wall behind them had such an interesting angle and the cabinets were going to have a gradual widening anyway, so we put them together.  This is one of the most interesting cabinets we've done.
As you can see, it sits beside the opening for the fridge.  There's the upper above the fridge and then a bank of uppers with glass doors.  I always love these showcase doors.  I think they're lovely and a great addition to any cabinet set.  The glass isn't set yet but you can see the inside is finished to match the face frame and there are finished shelves as well.
 The next pics show the hood.  These uppers are across from the ones I just showed you.  The hood goes all the way to the ceiling.  And there's another showcase cabinet with glass doors!  Wow!  Can you picture it?  The middle cabinet in the hood is actually just an enclosure for vent work.  It's not finished inside and will probably never be.  But then the only people who will actually open it are HVAC guys.  Still, I like the idea of it and it's smart to have such a functional cabinet and make it pretty.
 Next we show the cabinets to the right of the hood.  There are three you can see in this pic.  From left to right the first is the recessed thin cabinet.  The second has a space for the microwave while the third is a full length floor unit with a space for the oven.  I really like the way this section was designed because you have a gradual three step from the recessed cabinet to the floor unit.  When you look at them with the hood, it looks even more interesting.  There's some great geometric flow happening here.
 This pic shows the showcase cabinet, the hood and you get a better side view of the step pattern from the previous pic.  As you can see, only the right side and the hood have the crown molding on.  The right side took place later.
 This photo is an attempt to show the other wall with the angle cabinet and the two showcase uppers.  There's Greg, one of our crew and part of the installation team.  You can also see the wall frame we built along the back of the base cabinets.  A beautiful barback was attached shortly after I took this pic and I will show you that in a minute.
 These are the base cabinets.  The area on the ground where you see pipes sticking up is where the island will go.  As you can see, the base units run along the wall and then curve out and around along the wall we built to attach the barback.  At this point, the barback was on, but we're looking at it from inside the kitchen.
 These next two pics are of the barback.  I wanted to show it from the great room.  This is how the kitchen will look as you approach from anywhere else in the house.  That nice dramatic flow of the upper units and that gorgeous barback...  I can't wait to see it with counter tops on.
This is closer view of the barback.  I was trying to get rid of the glare from the big picture window nearby.  This house sits north to south in the lot, so it doesn't get a lot of direct sunlight, but it does get amazing natural light.  Lots of it.
 This is the laundry room.  With doors on both ends of the room, there's only the two walls to put cabinets on.  This side has a full length cabinet with a row of uppers and then a desk with two drawers.  The Antique Mahogany looks amazing in this room and really pops out with the wall color.  I think this room displays the color best.
 Here's the other side.  There's a vanity for a sink and then space for the washer/dryer.  There's a row of uppers and I believe there will be a closet rod hung under the smaller upper.  It will go from the finished side of that larger three door upper to the wall.
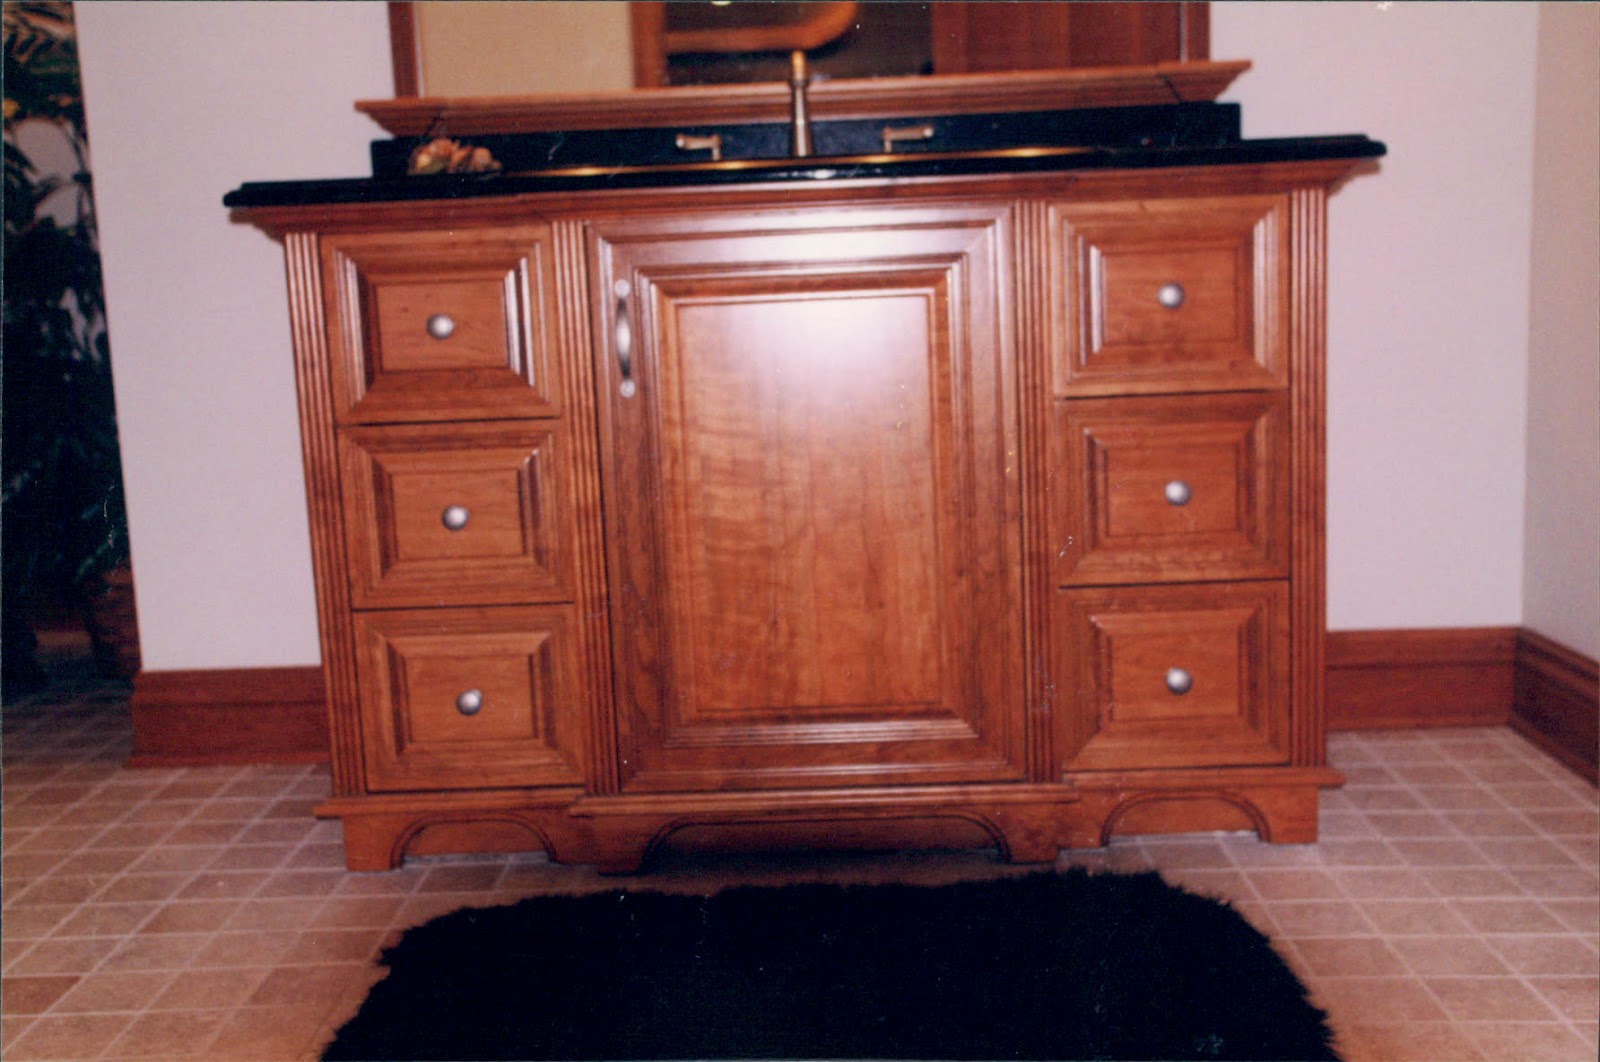
 The last two pics I have are of the vanity in the guest bath.  I saved these pics for last because of all the cabinets in this home, this one is really pretty and exceptional.  I love the door design and I really love the way the bottom of the cabinet was cut.
 I think this cabinet is quite fancy and a great example of some of the custom work you can find at Goodwin Mill And Cabinet.  If you can dream it up, we can build it.  I also love the turn posts on both sides.  It gives the unit a sturdy look and quite frankly increases the ornamental quality.  

There are more pics coming.  I'll get more once everything is installed and you can see how it all fit together.  This is the fourth or fifth house we've installed using our new system and as in the past, it's been effective and saved time.  Goodwin Mill And Cabinet is dedicated to producing exceptional cabinetry and timely installations.  Call today to set up an appointment with one of our Design specialists today and be on your way to having your dream kitchen!  We'll build 'em to fit your space!

Thursday, July 19, 2012

NEW CLIFFS JOB

 At Goodwin Mill And Cabinet nothing is standing still.  In fact, things are moving forward at an alarming pace.  The next job I'm going to profile here is the Porter home up in the Cliffs subdivision.
 The builder is a gentleman named Tad Porter of Porter Custom Homes.  We've done work for him before and enjoy his professionalism!  He's a great contractor.  I'll try to find a link to his website and include it.
 Before I start showcasing our work in this home, I wanted to give you an idea what the house and area were like.  The first two pics show the incredible custom wood beam ceilings.  We did not do the ceiling beams in this home.  I'm not sure who to give the credit to, but I think they are interesting and I wanted to show them because I think it helps you get a feeling for the taste and style of the owners of this home.  Personally, I think they are just marvelous!  It's made me think about different things we could do with our custom ceilings.  If I can find out who did the beams, I will include a link if they have a site.  Check back for an update.
 The next few pics attempt to show you what this house enjoys for a view.  You get great views of the incredible red rock mountains surrounding the area.  The lots themselves sit at the base of a range of these red cliffs.  Hence the name, "The Cliffs".
You can see another house being built across the street.  This lets you know how popular the area is.  Everyone wants to live there.  The third pic is taken directly from the garage where one might be standing if you were walking out to the driveway.  Isn't that incredible?

 This next pic is a sneak preview of sorts.  This odd looking ceiling actually mirrors an island we're putting below it.  It's also a peek at the cabinets already up in the kitchen.  The color for this house is Antique Mahogany.  The island will actually be Green Grasses, but the majority of the cabinetry is the Antique Mahogany.
The final pic in this entry is of the exterior entryway.  As you can see, the custom ceiling treatment is done out here as well.  It adds a touch of rustic charm to the home and even though this type of addition is often highly associated with a southwestern look, the home manages to keep clean, modern lines and achieves a strong sense of space and balance.  I absolutely love it!
I hope you're looking forward to seeing some of the incredible cabinetry Goodwin Mill And Cabinet has created for this home.  I'm excited to show them to you.  But we must have patience and you must wait another day until I can post a detailed entry on this house.  Until then, call Goodwin Mill And Cabinet today to set up your appointment to create your dream kitchen!

Wednesday, July 11, 2012

THE STORY OF THE TEARDROP TRAILER - PT. 15

 More progress this week.  The boys completed the trim on the other side of the trailer and put the finish Automotive lacquer on the two sides.  It's a relief to have the trim done as it took awhile to do.  They only have small things to do now until they get ready to spray the roof.
 Here is a view of the back and the trim that covers the trailer frame.  As you can see, it cleans up the look of the back pretty well.  It also has a bit of a shine to it now.  That will increase once a finish Automotive coat is put on.
 The mattress fits into the sleeping compartment perfectly.  Kent's wife, Fern made a cover for the mattress so it would stay clean.  It looks and feels quite comfortable.  Even just looking at it.

Folding the mattress back exposes the carpet they laid.  It really gave the compartment a finished look.  They still have some tacking to do, but it is officially in and it looks good.

For more information on the teardrop trailer, the Goodwin brothers or Goodwin Mill And Cabinet, you can check out our website online.

MAKING A DOOR

 Have you ever wondered how your cabinets are made?  Well, I thought I'd use this entry to show you the process we use at Goodwin Mill And Cabinet to build the doors and drawer fronts for your cabinets.  They're the most difficult part of the cabinet process and the most time consuming.  It all starts with raw lumber boards like the ones in this photo.  It's hard to believe something like that can become a beautiful door.  The first step in the process is milling the material.
 The boards are run through this saw with a laser guide.  Each board is cut on one side giving it a straight edge.  The board is then flipped and the straight edge is run through against a guard to give you a board that has parallel sides.  What happens next depends on what the wood is going to become.  
This diagram shows the parts of a door.  The panel is the center piece and it's framed by the stiles and the rails.  The stiles are usually longer and the grain of the wood runs the same direction as the panel.  The rails are grooved to hold the panel and the stiles.  They are often shorter and the wood grain runs opposite direction of the panel.
 If the boards are going to be stiles or rails, they are put through a plainer to reach the desired thickness.  In this pic you can see some pieces that will be cut down into stiles or rails going through the plainer.  As the pieces go through, the edges are smoothed down and evened out.
 If the wood is going to be a panel, they are cut down to a rough size of the intended door and glued together.  Here is a panel just glued together in our big clamp.  After the glued boards dry, they are taken out and run through the plainer like the stiles and rail pieces.  They are also cut down to their exact panel size.
 The next step in the process is cutting the tongue and groove joints into the panels, stiles and rails.  This process is also one of the ways the design of the door is created.  In this pic, the panel is be edged.  So far, two of the four sides has been cut.  This particular panel style is known as a "pillowtop".
 Here's a closer view of the edge.  See how the wood on the panel pillows up from the edge?  Part of that edge will be seen once the door is put together, but most of it will be hidden by the stile and rail.
 This machine is like the panel edger.  It helps create the style of the door and also cuts the groove the panel fits into.  First the boards are cut to length and then put through this edger.
 In this pic, you can see a close up of the stile.  It has a groove for that "pillowtop" panel.  It also has a simple design along the edge going into the edge of the door.  The side will also be routed to give a similar edge for the outside of the door.

 Now, the panels and the stiles/rails are put together.  We use wood glue to hold the pieces together, but we also use a nail gun once the door is assembled.  In this pic, you can see this door has the stiles on the panels.  The lower rail is also on, but you can't see it.  All that's left for this door to be complete is the top rail.  In the next pic, the top rail is being attached.  The groove is glued and then the piece is pushed into place by hand as much as possible.  Sometimes you have to use a rubber mallet to get the tongue and groove together tightly.  This door went together rather easily and no mallet was needed.
 Once the door is together, it's clamped in order to let the glue dry and to help the door keep its shape.  While in the clamp, we use a nail gun along the joints to secure the stiles to the rails.
 Even though the wood has been through a plainer, it can still be rough.  There can be patches that have some glue exposure where the panel was glued together.  The next step is the big band sander.  We run the doors through until they reach the desired thickness.  At this point, there's no more give in the thickness of the piece.  Any additional work must occur superficially to refine the parts without compromising the width.
 The doors are then sanded by hand.  We use air sanders and electric vibrating sanders to finish the sanding.  These tools create a smooth to the touch surface all over the door.  They also give the wood a shine of sorts.
 And now the doors are ready for finish work.  This is the part of the process that is really exciting.  You get to watch the door change right before your eyes.  In this pic, stain is being applied to the wood using a sponge.  The sponge lets you get stain into every nook and cranny of the door.  Rags are used afterward to remove the excess stain and leave the wood looking like the color you've just applied.
 The stained doors are then taken into a spray room where they are sealed and sprayed with a protective coat.  This process gives the doors their glossy look and makes them feel slick to the touch.  Here we see two drawer fronts being sprayed with sealer.  After the final coat has been sprayed on, the doors must sit until they dry.
 Now the door is ready to be put on the cabinet.  The assembly crew uses a machine like the one you see pictured here to bore into the door and put a hinge in place. 
 Once that hinge is on, you can go ahead and attach the door to the cabinet.  We use adjustable hinges on our doors.  These hinges allow us to shift the door once the cabinet is installed.  Usually, when we measure an area for cabinets, the walls aren't finished.  Everything from drywall to texture can change the way a cabinet sits in the space it was built for.  As we anchor the cabinet in place, the doors can sometimes shift out of alignment.  That's where the adjustable hinges come into play.  We can use them to put the doors even again.
The end result is something like this piece.  A glossy, beautiful cabinet that looks incredible almost entirely because of the detail in the doors and drawer fronts.  Yeah, the process can take some time and as you can see, there's a lot of work that goes into making your custom cabinetry...  But at Goodwin Mill And Cabinet, we think you want something special in your home.  After all, it can be your greatest investment.  
Although they are used everyday and become something we take for granted, cabinetry can define the beauty of a space in a way unlike anything else.  Exceptional cabinetry can also bring value to your home.  Goodwin Mill And Cabinet is a company who puts in the work to create amazing custom cabinetry.  You can see how much we do to bring your dream kitchen to life.  Call today to set up your appointment with a design specialist and get the door process started for your doors today.  We're ready to order the lumber!