We had two homes in the Parade this year. The second was a beautiful property at the Ledges. This exclusive community is situated above Snow Canyon National Park. This particular home is located next to the golf course. It's smaller than the other home and we did less here than in the other, but it's still an amazing home with some incredible cabinetry and a few custom items.
 The first pic in this entry is a view of the entire kitchen. Once again, most of the appliances are paneled to look like cabinetry and there's an island in the center with additional drawers and shelf storage. In this pic, you can see the entire room however, the sink side is at such an angle, you can't see it well. But never fear... I've got you covered.
 This pic is the stove and hood. We made the hood out of wood and it's been covered with a bronze metal sheet. It really adds to the coloring of the cabinetry. The tile work behind the stove is also incredible. I love the look and the base of the hood gives it a substantial feel you wouldn't normally have. There's a rustic feeling... Like cooking over an open fire. It's also worth noting; the two turned posts on either side of the stove are actually spice racks that pull out. This is a feature that's becoming quite popular and is fast on its way to becoming an area standard.
The next photograph shows some tall paneling. The two panels on the end are actually the refrigerator and  the freezer. The next row is a three cabinets stacked. Each has shelving and their own door. The real surprise is the next two sets of paneling...
These panels are a false front that open to a pantry. Hidden pantries are another item becoming a standard in Southern Utah homes. The whole panel is easily pushed to open to reveal the hidden room and on the backside, the panels are finished and include a panel length handle you can grab to open it back up. Normally, on false fronts we don't include handle hardware, but in this case, the handles are included. It contributes to the illusion of shelf cabinetry rather than a hidden pantry.
 The next pic is the opposite view of the kitchen. You see the sink, the valance over the window and you can see the glass doors of the decorative lazy susan corner cabinet located on top of the granite top. The glass doors make it ideal for china storage. It's interesting shape and contour make it a centerpiece for this lovely kitchen.
 The second bedroom features some interesting angles. This cabinet is the bathroom vanity and you can see the angled edge on the side of the cabinet. It's comprised of three pieces; two drawer banks and a sink vanity in the center. Although it's a simple configuration, the angles give it a complexity and makes it interesting. It also increases the counter top space; which for this particular room is a huge asset. There is another bedroom aside from the this one and the master, but it's in a Casita.
For those of you not in the know; a Casita is a self-contained attached apartment. It has a private entrance and is not accessible from the inside of the main house. Small Casitas are becoming common in this area. Many people are choosing them as  places for elderly parents to live. It allows them a form of assisted living while maintaining their independence.The next pic is the master bathroom. This room was interesting for a number of reasons. It's also become quite popular to have a shower separate from a tub. And this house really
  stressed that separation. The tub is an old fashioned brass number while the shower sits in an enclosed area. The two vanities in this room are mirror images of each other. In the first pic, you can see the vanity on the far wall. In the second, you can see a side view of the other cabinet.
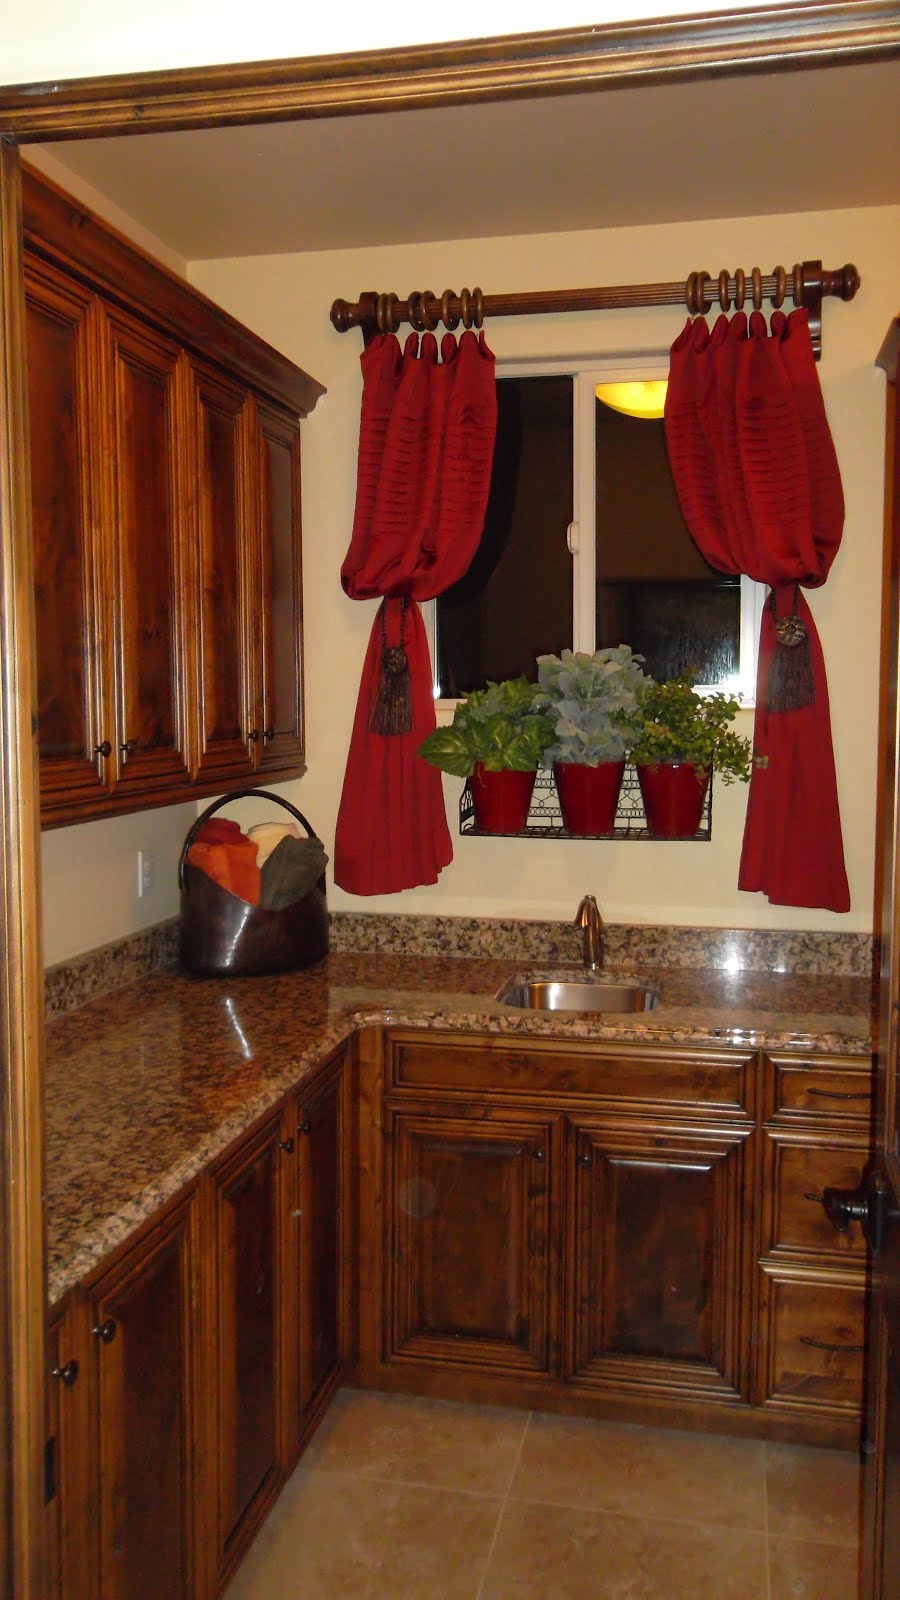
 The next two pics are the Laundry room. As with the other Parade property we did, this room is functional and easy to navigate through, but there are no good angles to take pics of the cabinetry. This home had a two upper rows of cabinets and one bank running along two walls for the lowers. In the first pic, you can clearly see the main row of uppers. This group are the same size and are all shelf units. You can also see the granite counter top and some of the lowers.
In the second picture you get a better sense of the lay out. You can clearly see the uppers ending in the far wall. The length of the row is the width of the room from door to opposite wall. You can also see where the lowers continue around the corner. Directly above the sink is a window. What you can't see, is on the other side of the window, there are additional upper cabinets. Both the uppers and the lowers bump up the the washer and dryer. It's a shame these rooms usually don't have great angles of pics. They are often some of the more elaborate and beautiful pieces depending on the needs of the home owner.
We have another laundry room we're working on right now. It's been installed, but the house isn't finished yet. However, when it is, I want to get some pics and share them here. There's a couple interesting trends in laundry units I'm finding fascinating.
 The next group of pics I have for this entry are from the master bedroom. We made the bed in this room. This bed, headboard and footboard, are the second piece of custom furniture I really think will become a staple in local building. I predict this piece will be essential for homes in the coming year.
As you can see in the first pic, the foot board houses an automated flat screen television. It can be raised up for viewing from the bed or lowered and hidden in the foot board when you're done with it.
The second pic shows the flat screen  lowering back into its housing. The gentle automation is quiet and unobtrusive. The third pic is actually showing the television raising out of its housing. Once lowered, the television is completely concealed. It might be more of a guy thing, but I can't imagine a single guy not wanting a TV attached to the bed!
I've just found one more pic I can show you of the bed. It's a full bed photograph similar to the first pic, but it shows the bed from another angle. It's actually my favorite pic of this bed. Once again, we worked in conjunction with Tapestry Design to create these pieces. Tapestry is also responsible  for decorating these homes and supplying the window treatments.
The next pic is a vanity in the half bath/powder room. This was another piece that was custom designed to fit this space. It features turned post legs and a complex round design on the false front. The sink itself is a bronze similar in color to the material sheeting attached to the hood over the stove. This color also flows into the master bath. Remember the tub? Together, these colors tie the whole home together!
 The final pic in this entry is the mantle we built for the fireplace. Stone fireplaces seem to dominate the local scene and these wood mantles are the perfect accent to soften the rocky edges. We use distressing to keep the feeling homey and understated. The contrast is just enough to create a subtle blend. As you can see, you get a lot of old world charm in a new living space.
Our overall impression of the Parade this year is one of happiness. We enjoyed being part of this tradition and to be included among so many talented artisans. It was challenging, but the rewards speak for themselves. We're a part of quality home construction. Special acknowledgement to JMI Constructors and Rock Solid Builders for using us this year. We've enjoyed working with you and look forward to more collaborations! Thanks to Tapestry Design for putting on the finishing touches and supplying us with these wonderful photos. They made it beautiful.
You can learn more about JMI Constructors HERE.
You can learn more about Rock Solid Builders HERE.
Discover the Southern Utah Parade of Homes HERE.
Contact Goodwin Mill & Cabinet HERE and for more information on Tapestry Design.
 Today I'm going to post some pics of the work we did at the Parade this year. I've also got a link to our website gallery with even more pics! This particular collection is all about some of the custom pieces done for this house. You will see some accents we did and also some furniture we built specifically for this floor plan.
This first picture is an Niche-Seat in the entryway. The opening is built right into the wall and accented by some post turnings and a seat we built for that space. It's height and cushioned bench are a wonderful addition to the entry way and help draw the eye to other majestic sights in this space. The next pic is the fireplace in the Great Room. It showcases a Mantle built in a style that flows into the kitchen area. The decorative texture along the face and the thick corbels give it a strong appearance. It looks even more bold thanks to the stone fireplace behind it. The ideal place to kick back on a cold day.
 In the pool house you can see this wonderful cabinet. Used to store media for the adjacent entertainment center, this complimentary piece is both aesthetically pleasing and functional. It contrasts nicely with the green grasses color used in the stain. The tall crown and long upper tier make this piece look unusually regal and stately next to the permanent entertainment center.
The next pic is the front door. The glass and metal work were added after we'd installed the doors. We built and finished the doors along with the threshold and the casing... The delicate archway over the door is a theme carried  through the entire house. From Valances above and below cabinets, to the shape of desks, drawers and window casings. Rounded walls, soft corners and arches over various openings help soften the use of stone and tile. The danger with solid surfaces like tile, stone, brick or concrete is they can often leave your living space feeling more like the Coliseum rather than a warm, inviting home. Using soft rounds is the perfect juxtaposition to the granite, tile and stone work throughout the home.
You can see this even more clearly in the next pic. This floor separates the master bedroom from the french doors leading to the pool patio.  We built this serpentine bull-nosed border for the wood flooring to help transition the change from the carpet floor. As you can see, it sits on top of stonework and runs into stonework leading into the master bath. However, the gentle curves soften the rough look of the stone and help it appear more natural.
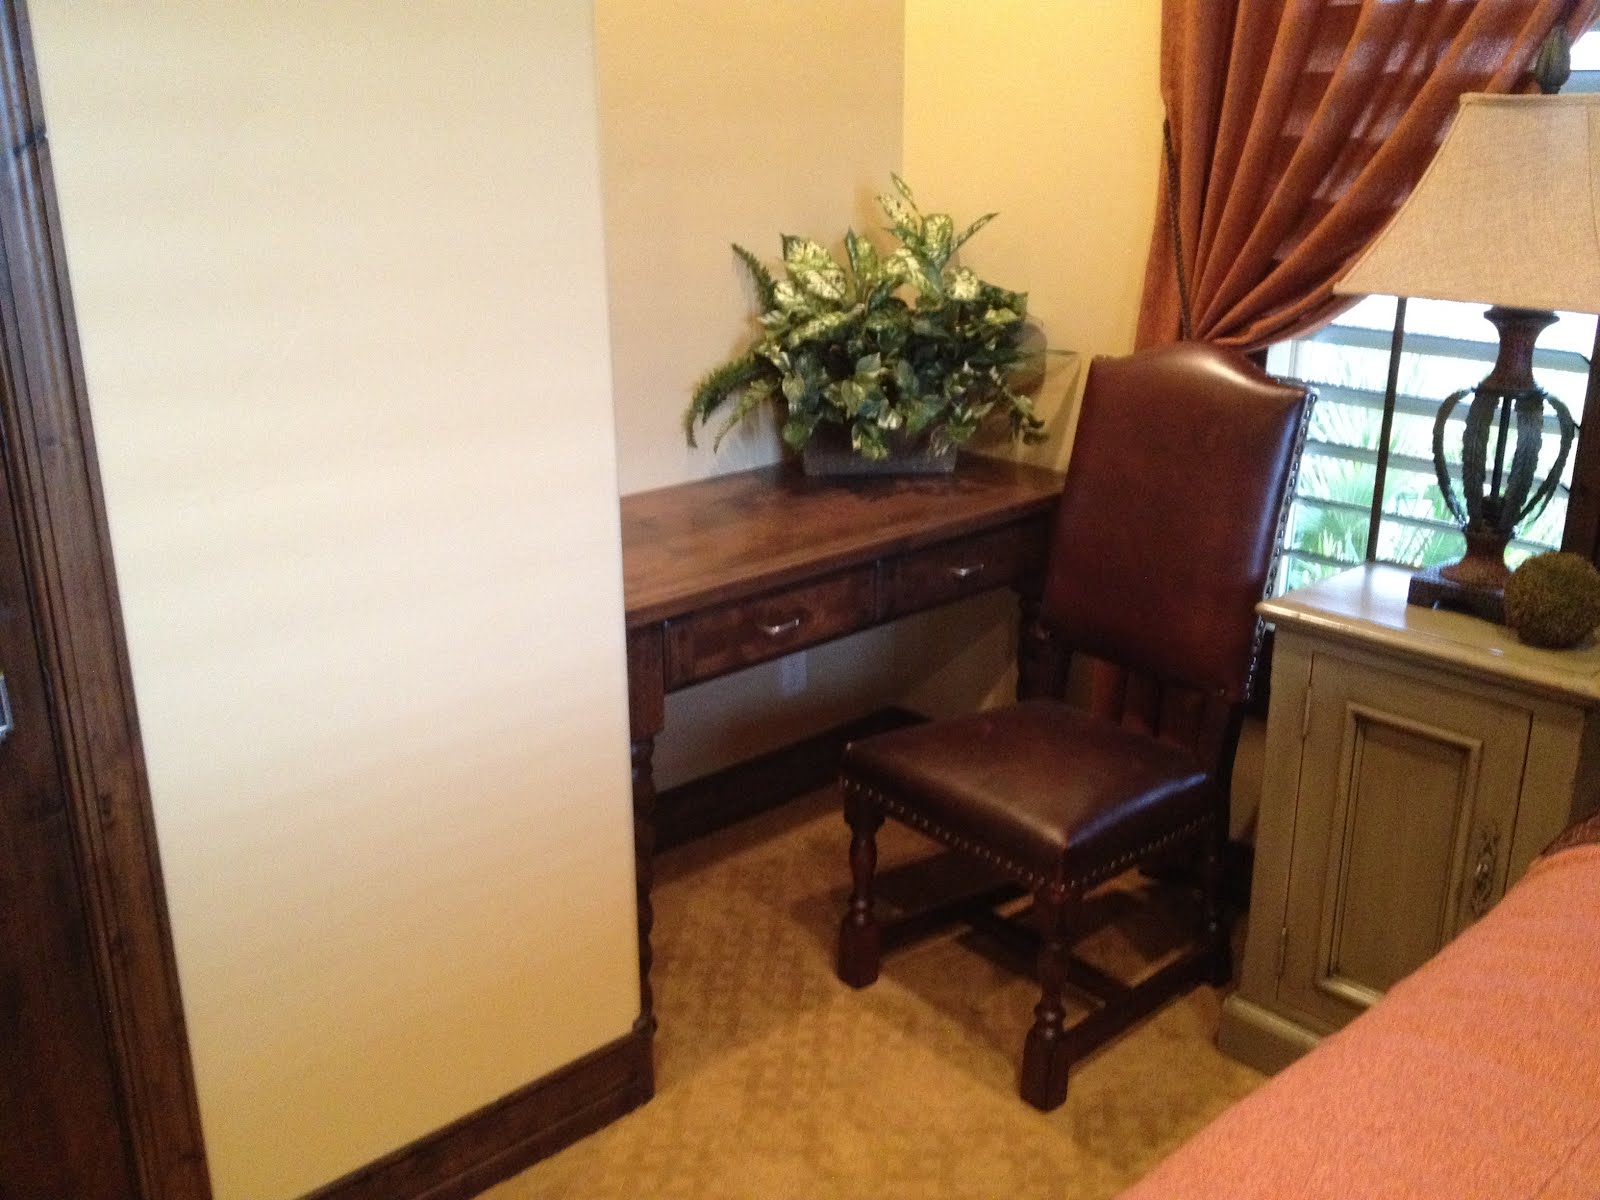
The next pic shows the desk we built for the office. Once again, that arch  theme is repeated. You can see it above the chair in the upper cabinetry. There's an arching valance over the opening between the two posts. The desk itself is shaped in an arch. In the next pic, you see the chairs in front of the desk and another piece built for this office...
It's a small table situated between the two chairs and once again, its shape carries on the rounded theme. Notice the curving in the arms of the chair. There's more arching in the mirror frame above the table, however, you can't see that piece clearly in the pic. I will try to find a better one of it as it looks incredible.
Make no mistake, careful attention has been paid to encourage a more organic, geometrical flow throughout the house.
 The next photo shows a desk we built into the wall of one of bedroom #3. The drawer/desk is mounted on two posts and secured directly into the wall in the back. Look for the rounded edges!
My final pic is the mantle in the master bedroom. I love this pic, because you also get to see the overhead beams reflected and once again, you see the arch theme present in the mantle itself. The stone corbels are an  imaginative touch. Though not as intricate as the mantle in the Great Room, it's sophistication is in the curve of the piece rather than intricate detailing. The color and style matches the ceiling beams tying the entire room together on four separate surfaces. It's a well balanced display and one worth experiencing first hand.
You can call Goodwin Mill & Cabinet today to see more amazing ideas and to realize your own dreams. You'll find them HERE. You can also log into our gallery and see more pics from this exciting home. The Gallery is HERE. You can also explore the 22nd Annual Southern Utah Parade of Homes through their website HERE.
 The first pic is the entryway. You can see the five beams we put up there. It was a bit on the crazy side. We needed some tall scaffolding to get up there and then we had to lift them up and hold them in place while we secured them. We later used scaffolding again to attach the corbels used along the edges to build up the sides. That was a
  bit on the scary side, but still fun and we're proud of the way these beams turned out. Just great!
 we faced when we set out to install these beams was the best way to position the beams so they would line up in some way with the flow of the house and the room it was adjacent to. We were also forced to cut one of the beams in two to accommodate the look. We initially intended to fit them together using a cut in each beam, but time forced us to cut one beam in half and create the illusion of solid wood.
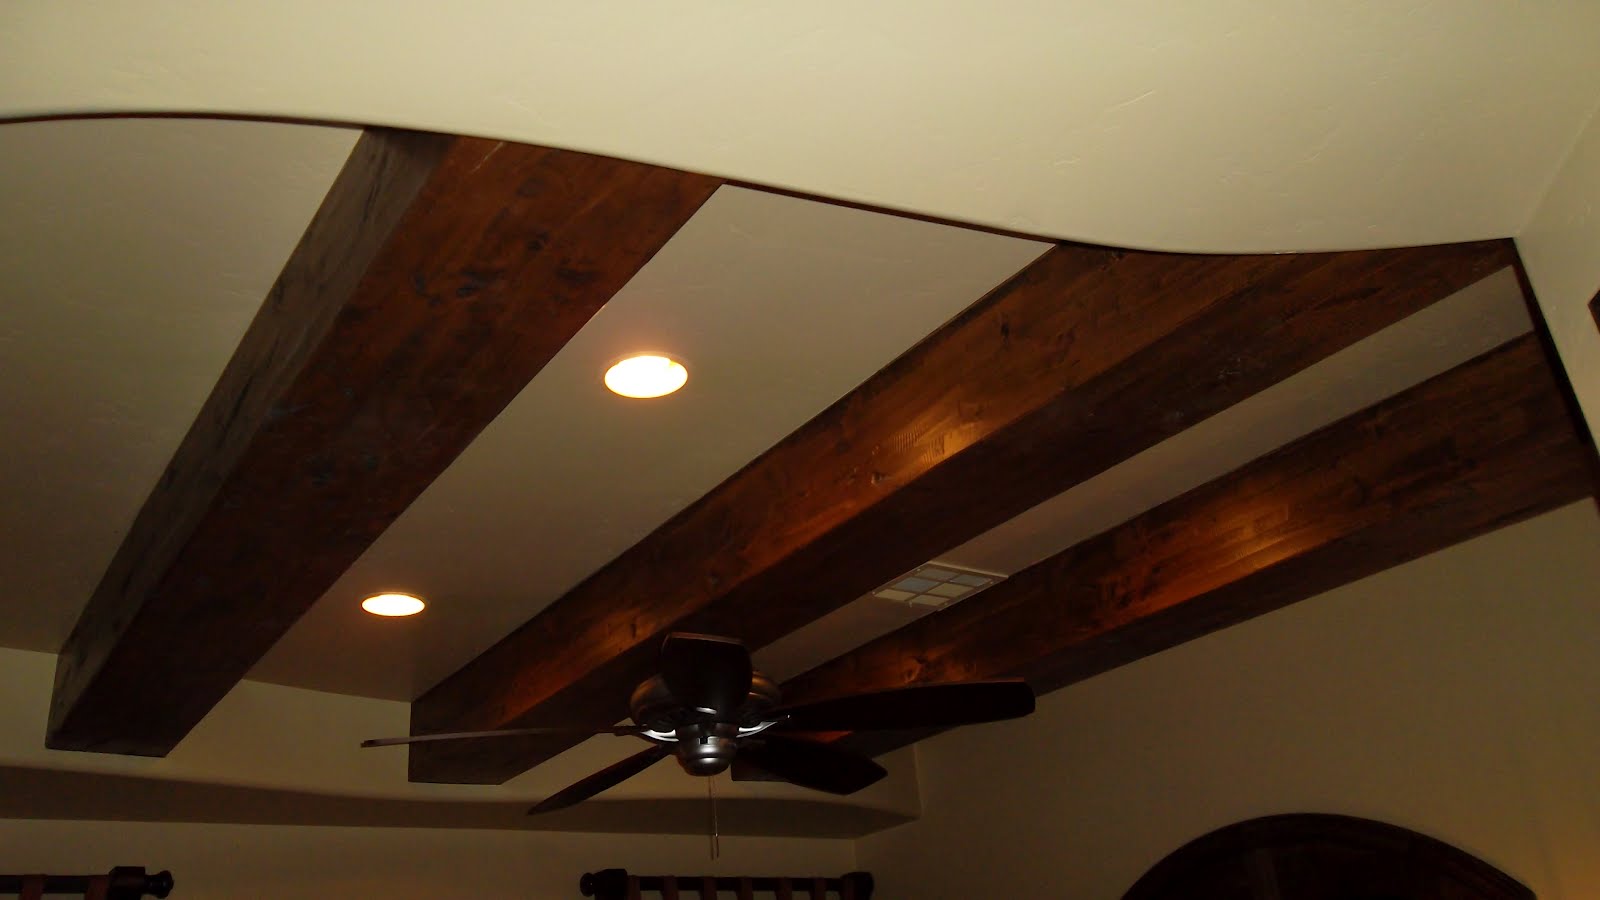 height giving the illusion of being less substantial.
  beams fit up tight and looked like they carried through.


